Art Applewhite Rockets Turbo Delta Flying Saucer 18mm (4")
Art Applewhite Rockets - Turbo Delta Flying Saucer 18mm (4") {Kit}
Contributed by Mark Kulka
| Construction Rating: | starstarstarstarstar |
| Flight Rating: | starstarstarstarstar |
| Overall Rating: | starstarstarstarstar |
| Manufacturer: | Art Applewhite Rockets  |
Brief:
A new version of Art's popular 18mm Delta Saucer that has been streamlined in profile and in price. After seeing how
this new version flies, you may have to revise your notions about the potential performance of UFO-style rockets.
Construction:
This kit was tucked in as a complementary gift with my recent order of a couple of Art's saucer kits. At the time, it
had not yet been announced on his web site. The kit consists of a single 8.5" by 11" sheet of high quality
cardstock upon which all of the parts are printed along with three pages of detailed and well-illustrated instructions
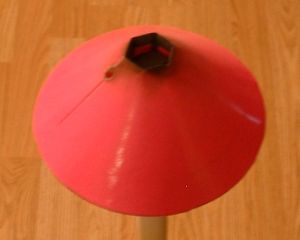
printed on two 8.5" by 11" sheets of paper. My kit was printed on hot pink cardstock. Other colors that are
available for this kit include white, fluorescent shades of either orange, red or green, and neon yellow. The
unassembled parts on the printed sheet appear to be identical to those of any of Art's other low-power Delta saucers.
I had previously built several versions of the Delta Saucer, ranging in size from the 2.25" diameter Micromaxx version to the 6" diameter 24mm version. Construction of the Turbo version is identical to that of the 13mm to 24mm-sized versions. The included instructions are very detailed and well-illustrated with black-and-white photos of key stages in the construction process. I read through them just to see if anything had changed from previous versions then started construction by cutting out the parts from the cardstock sheet. The design features Art's new, hexagonal motor mount, which has a built-in motor block, so there are only three actual parts to be cut out. The outer edges of the upper and lower shrouds are the only curves that need to be cut. With a fresh #11 blade into my X-Acto knife, I took my time and carefully cut these right on the printed line. All other edges, including the diamond-shaped launch lug hole are straight lines and were easily cut with the help of a metal straightedge.
Working in small arcs around the circumference, I pre-curved the upper shroud around my index finger then glued the ends together using the provided tab. The instructions not only recommend using only one type of glue (white glue) but also recommend only one brand (Elmer's Glue-All), applied in a thin, even layer. For once, I actually followed these specifications and was very pleased with the results. Another thing that I did for the first time in this build was to use the shroud's glue tab as intended to join the ends using a lap joint. In the past I had always cut the tab off, along with some additional material in effectively double the tab's width, and then glued it under the two ends of the shroud in a butt joint so that the joint would be flat and even. This time, though, I went with the recommended method and was surprised to find that the result was almost indistinguishable from the more complicated butt joint while being much simpler to assemble.
 Construction of the lower shroud followed the same pattern with the additional
step of scribing a fold line about 5/8" inside of the outer edge of the shroud with a ballpoint pen and then
folding the edge out to make a flange that is used when gluing the two halves together. This step is not as difficult
as it looks at first--just work slowly and patiently and it will come together. An arrow is printed in the lower shroud
to aid in aligning it properly when gluing it to the upper shroud so that the launch lug holes line up.
The motor mount is simply a strip of cardstock with six tabs along one edge, which are individually folded down and glued. The strip is then folded and glued to form a six-sided tube with the folded tabs on the inside where they form the motor block. The motor tube is then inserted through the central hole of the shroud assembly, which completes the construction. I did deviate from the instructions in one small way by inserting a standard 1/8" paper launch lug through the launch lug holes and gluing it in place. (A 1.75" launch lug fits exactly between the two holes in the upper and lower shrouds.) While this step is not exactly required, I chose to do so to prevent the cut edges of the launch lug holes in the upper and lower shrouds from catching and binding on any residue on the launch rod and to keep the rod from eventually tearing the holes. My total construction time was approximately 30 minutes.
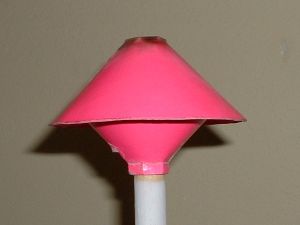
 The resulting rocket is the same height as Art's 18mm, 24mm, and Ultra Delta
Saucers while being 2" smaller in diameter. Despite it's light weight (mine came out right at 10 grams or
0.35oz--lighter than the advertised 0.4oz.), the Turbo Delta seems to be quite sturdy and looks like it will hold up
well for many flights.
PROs: Simple, effective design, involving only three parts. Clear, well-illustrated instructions. Builds quickly. Recommended adhesive and construction method produces a clean, sturdy model.
CONs: None. You can add a paper launch lug to span the two holes in the upper and lower shrouds as I did, but this is not absolutely necessary. The kit's lack of a paper launch lug probably has no real effect on its performance so I did not deduct any points from my rating because of it. My addition of the paper lug was merely an optional enhancement that I made to the kit.
Finishing:
As with all of Art's other kits, the Turbo Delta is already pre-colored and requires no painting. I did give my Turbo
two coats of clear coat as recommended. I used Wal-Mart clear spray paint, which gave it a pleasingly smooth, glossy
appearance.
Construction Rating: 5 out of 5

Flight:
Because the Turbo Delta has a narrower diameter but the same height as Art's Delta saucer, the upper shroud has a
noticeably steeper slope, and it presents a smaller cross-section to the air during boost. These two factors have a
pronounced effect on the Turbo Delta's performance. I have made a total of 6 flights with my Turbo Delta so far. It
made its maiden flight at ASTRE's Whitcavitch 20 meet/sport launch in Johnstown, NY, on June 2, 2007. I prepped it with
an Estes C6-3. The motor made a close but not tight fit into the mount so just for assurance, I put a single wrap of
mylar tape around the motor/tube joint. Since the ejection charge would not pressurize anything, there was little
chance that it would spit the motor, but I just added the tape just to be sure. I would not have bothered with this
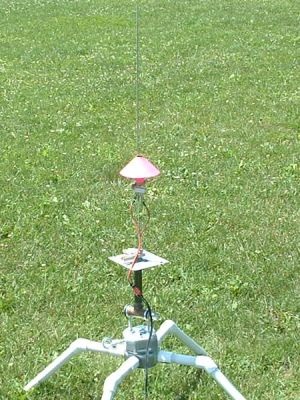
last step if I chosen to use a C6-0 instead. I used a clothespin to hold the Turbo about halfway up the launch rod,
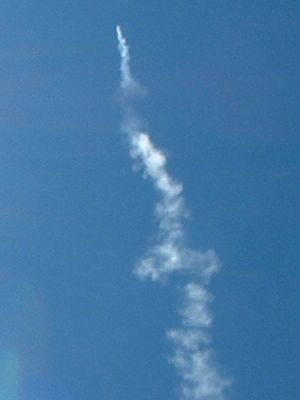
hooked up the clips, and prepared to launch. The launch button was pressed, and the Turbo took off fast--much more so
than I was expecting. Despite somewhat breezy conditions, the Turbo made an arrow-straight boost to somewhere around
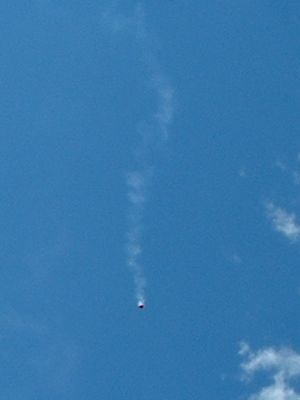
400ft. A half-second or so after the motor burned out, it reached apogee and then began to tumble end over end, making
a slow, gentle descent.
I launched the Turbo 5 more times, all on 7/22/07 at the school athletic fields in Tupper Lake. I wanted to compare its performance to flights of a regular Delta Saucer and a home-built cone rocket. Since I don't have the ability to launch a drag race, I had to fly them sequentially. Instead of taping the motor/motor tube joint, I just friction fit the motors using a couple of wraps of masking tape around the lower half of the cases, and all motors were retained this way. On C6-3s, the Turbo easily beat out the Delta in both speed and height and was comparable to, or even seemed to have a slight edge over, the cone rocket. I also flew the Turbo on a B6-2, which had speed comparable to the flight on a C6 but with a lower peak altitude (around 200-250ft) and on an A8-3, which resulted in a somewhat slower, low altitude flight (about 100ft) that was actually fun to watch. Using the A8-3 in the Turbo would be perfect for some fun flying in the backyard. I also flew the Turbo twice more on C6-3s just for fun (and to finish off the pack). All of the Turbo's subsequent flights on the C's were just like the first one described above and were straight up flights without a hint of weathercocking despite the breezy conditions (5-15 mph variable winds).
Recovery:
Despite its more streamlined shape, the Turbo Delta still recovers via a combination of tumbling and aerobraking. In
all of its flights, my Turbo tumbled exclusively for slow, gentle recoveries. All flights were with a breeze though, so
I can't say if it would do more aerobraking if it was flown on an absolutely still day. The only damage after 6 flights
is some charring and soot build-up on the inside circumference of the motor block and some minor scorching around the
motor tube joint on the outside of the upper shroud. The underside had a very thin layer of soot, which wiped right off
the clear coated surface. A small area of the colored layer of cardstock around the bottom of the motor tube peeled off
when I removed the Mylar tape after the first flight. When I build another one, I plan on smearing a very thin layer of
epoxy on the inside of the motor block to protect it when I fly it with motors that have ejection charges.
PROs: Flight prep is as simple as can ever get. Very fast, very high boosts for a low-power saucer-style rocket. Stable and quite resistant to weathercocking, more so than even most other saucer-style or cone-shaped rockets. Excellent bang for the buck when flown with black powder B and C motors. Slow and gentle tumbling recoveries. Since the entire rocket acts as its own recovery device, there is no chance that the recovery device will fail.
CONs: Inside of motor block and outer surface of upper shroud will get scorched and charred if the Turbo is flown with motors that possess ejection charges. (Using booster motors exclusively will prevent this.) Also, the Turbo will rapidly deplete your stock of black powder B and C motors because repeat flights are so easy and so much fun.
Flight Rating: 5 out of 5
Summary:
As with almost all of Art's other LPR rockets, this one can easily be built in an hour or less. However, forget what
you had always thought about saucer-style rocket flights being slow and low--this baby really moves, is surprisingly
resistant to weathercocking, and gets serious altitude! Combined with the fact that it retails for a buck less than a
comparable standard Delta Saucer, it is a great value and provides excellent bang for the buck.
Overall Rating: 5 out of 5
 |
 |
Flights
Sponsored Ads
 |
 |


![Calling Marshall Applewhite [Explicit] Calling Marshall Applewhite [Explicit]](https://m.media-amazon.com/images/I/51MeUaBWTkL._SL500_.jpg)


