| Manufacturer: | Scratch |
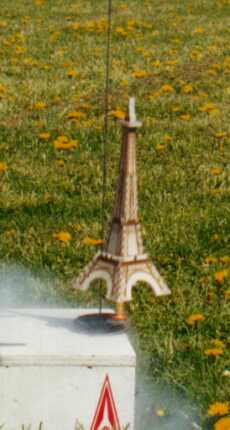
The Li'l Eyeful: (French National ICBM)
Puzz3D(TM) Eiffel Tower Flight Conversion
My family enjoys Puzz3D and our house has about a dozen on display. This is one of the smaller ones, and it came to me as a stocking stuffer about two Christmases ago. 13.75" tall and extremely light, it was one of those things the manufacturer didn't intend to fly but I immediately considered flyable.
If you haven't seen these, they are made from a foam-backed material about a quarter of an inch thick. The faces are built like a jigsaw puzzle and the corners have interlocking teeth.
Before converting it, I first had an important decision. Should I try to fly the original, or should I scan it, print it, and reproduce it in foamcore board? Although it would have been easy to completely reproduce it, and the finished model would be stronger, I decided to fly the puzzle for two reasons. First, more in the spirit of DesCon 8. Second, there could be copyright considerations. I ended up flying the puzzle with two parts replaced.
Flight Conversion
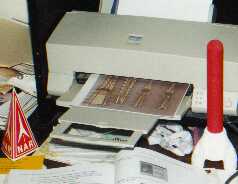 I began by assembling all the faces of the puzzle and assessing what needed
to be done. Knowing that I could destroy the puzzle and not be able
to replace it, I scanned all parts at 180DPI 16-bit color and printed them
out on several 8-1/2 x 11 sheets.
 The
top third of the tapering tower consists of two pieces of foam back-to-back,
thus two printed sides and two sides of raw foam. I decided to replace
this, so I scanned just that section of one of the tower faces and printed
out four copies. I cut the top section off of each printout where it meets
the bottom of the upper deck. There are little "ears" representing
struts on the top corners of these pieces; these were folded back, then
the four pieces glued edge-to-edge on a piece of card stock; this was cut
out, allowing a tab on one edge for gluing, and folded/glued into a tapered
box. The tip of this box is just the right size for BT-5. I glued
the little "ears" together and set them at 45 degrees on the corners.
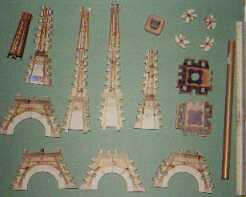
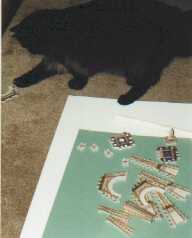
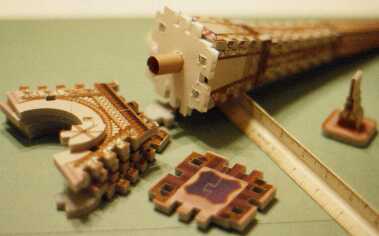
I also scanned and printed out the lower deck piece and glued it to a piece of foam core board. I carefully cut this out with a very sharp #11 X-acto blade, including all the notches, and cut a hole in the center for the body tube. I ended up doing this step twice; early on I thought I was building for A10-3T but I realized as I worked that it would need at least a B, so the hole had to be enlarged. At this point I laid out all the pieces neatly on the floor so I could see what was what. The photo at left shows all the parts laid out; the two reproduced parts show up somewhat darker in this photo. In real life it's much less obvious. At assembly I cut off the upper section of the tower so it overlapped the piece I constructed by about half an inch, and matched up the graphics as best I could when gluing.
 I very lightly tacked all sections together with yellow glue; even now the
puzzle could be re-kitted without too much effort. I assembled the two
"nose" pieces with their small deck, glued this together firmly, and sliced
off the portion that extended below the platform. A small cork became
the nose cone shoulder. For good measure I drilled a hole through
the cork and epoxied in 5/8" of 3/16" diameter lead wire, and also epoxied
the cork to the base of the platform. Then I drilled a hole in the
lead and epoxied in a small loop of Kevlar string to attach the shock cord
and parachute. Since the cork was tapered, I wrapped a narrow
strip of masking tape around the narrow end until it fit properly.
 The body tube
consists of 3-1/2" of scrap BT-20, 7" of BT-5, and a single centering ring
connecting them end-to-end with an epoxy fillet at the transition. I punched
a small hole about an inch ahead of the transition, pushed the Kevlar shock
cord through, and tied the free end around the outside of the tube, anchoring
it with a little yellow glue at the knot. Then the body tube was
inserted into the tower body, trimmed to length (9-1/4"), and glued with
a generous fillet to the foamcore platform. (This photo was taken
before I decided to change to an 18mm motor.) The motor mount eventually
extended about 3/8" from the bottom of the deck.
 |
cross section about
|
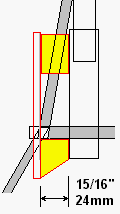 |
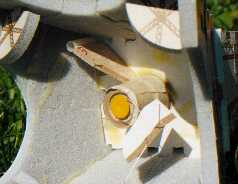
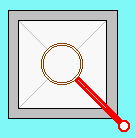
The launch lug was tricky. I had to cut away the foam at one corner of the platform and provide a standoff. The standoff is a trapezoid-shaped piece of balsa that is glued to the lug, the platform, and the mmt. At first I used just a single short piece under the platform, but it failed after four flights. Now there is a 3" lug extending 2" above the platform, and a second standoff as shown in the drawings. To insert the upper standoff, I had to cut a slot in the corner of the puzzle with a sharp X-acto. This orphaned some small wedges of foam, which I simply glued back in afterward. I ended up shaving off a bit of the corner of the upper tower section to clear the lug as well. The width of the standoff from body to lug is 15/16" or 24mm.
Flight
My daughter and I took the L'il Eyeful out to a local schoolyard on a partly sunny, breezy, freezing cold spring afternoon. Hailstorms, flying geese, and a sea of daisies and dandelions all added to the ambience of the situation. Li'l Eyeful flew on a B4-2, which proved a perfect choice. The motor rests against the centering ring inside and is taped to the mmt. In the other end, packing the chute was quite a challenge in the BT-5, but since that first flight only a streamer is used; destabilized, it falls like the block of foam it is for a safe recovery. Boat-stable, looking a little like a Snitch but quite a bit higher, it seemed to fly in slow motion, sort of drifting into the sky and leaving a smoke trail familiar from other cone-stabilized rockets. The parachute ejected but did not open; streaming its chute, it fell sideways and landed quite gently with no damage.
Later in the week it flew again with the streamer, and then four times at our club meet April 21. Unfortunately, when the most people were paying attention is the time it chose to bind on the rod and barely get off the ground, flights five and six. Inspection showed that the BT-20 mmt had come apart along its spirals, allowing the lug standoff and lug to pivot into a position that gripped the rod. It has since been repaired and has put up one more nominal flight.
Sponsored Ads
 |
 |


