| Manufacturer: | Estes  |
Brief:
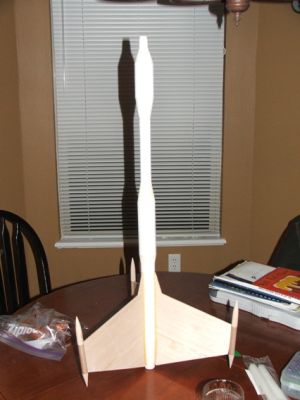
While never officially offered as an Estes product or even produced as a plan sheet, the Cosmik Debris is still by
some stretch of the imagination an Estes rocket, albeit one with something of a Centuri flair. No actual plans exist
for the rocket, but it's very possible that most BAR's have paged past it while on a visit over at
JimZ's site.
Cosmik Debris isn't really it's name, but part of the beauty of this project is that a lot of it, name included, is open for interpretation. As I mentioned, I first noticed the rocket while spending some quality time on JimZ's site. I had downloaded and printed off a copy of the Estes Custom Parts Catalog, a 1974 offering that is still a useful source of information for BARs who are trying to decode some of the part numbers in the Estes plans. On page 2, which is essentially an informational page, there is a picture of an S.P.E.V.-like rocket whose sole purpose was probably to show how easily a diverse bunch of parts can be melded into a flightworthy rocket. I liked the looks of it when I found it, but it was quite a long time before I realized that the picture might also contain all of the information needed to actually reproduce the rocket. I first dubbed it the CPC-74 (for Custom Parts Catalog 1974,) but later switched it to Cosmik Debris to boost the absurdity factor and set it aside in my files where it sat wilting until I realized that "I really could try to build this thing".
Construction:
Parts list:
- BNC-60AB nose cone (BMS)
- BT-60J (Red Arrow)
- 2 TA-5060 transitions (BMS)
- BT-50FE (Red Arrow)
- BT-60R (Red Arrow)
- TA-5560 transition, hollowed out (BMS)
- BT-55S body tube (Red Arrow)
- 3 BNC-5W nose cones (BMS)
- 3 BT-5CJ (Red Arrow)
- 3 BNC-5S nose cones (BMS)
- BTC-55Z tail cone (BMS)
- 3/32" balsa fin stock
- 2 launch lugs
- BT-20J engine tube (Red Arrow)
- EB-20A engine block
- 24 inch parachute
- 36" Kevlar® shock cord
- 24" length of 1/8" sewing elastic shock cord (Wal-Mart sewing department)
- large snap swivel (Wal-Mart fishing department)
As you can tell, this rocket is one that starts when the prize man drives up in his big truck and delivers a big package to your big house. All eleven of the balsa parts (not including fins) that this rocket requires are available from BMS, (And with a few more orders like this from me, Bill at BMS may be entertaining thoughts of retirement to a remote isle in a warmer locale.) With no actual fin pattern available, I conjured one by taking the length of the BT-55S pictured and dividing the actual length of a BT-55S by it. I took this number and blew up a copy of the fin that was shown on a copier and used that as a pattern. Just to be on the safe side, I also scanned the BTC-55Z tail cone and printed out a copy to get the correct taper to the root edge of the fins. Hardly what one might call elegant but definitely functional, and I almost hit it on the nose. The three fins were huge and bets were immediately taken on my chances of actually getting this off the pad due to their sheer size and weight.
The size of the fins made it necessary to construct them out of two pieces of 1/8" balsa joined together with a butt joint. After cutting out the two halves and making sure that the grain lined up with the leading and trailing edges of the fins, I allowed them to dry between two sheets of wax paper under a load of books for several days. The size and weight of the fins made it necessary to hollow out the TA-5560 transition to allow me to move the parachute up in the body. This was something that I accomplished easily, if not messily, with my Dremel tool.
Since there was very little room in the tail cone for the engine tube itself, I went without an engine hook and went with friction fitting. (I believe that's how it was shown on the illustration anyway.) In order to upgrade the shock cord to the 21st century, I tied a knot in a length of Kevlar® shock cord and glued it in with the engine block. Since it will be directly in line with the exhaust flame, I used a heavier piece than normal.
Finishing:
Well, I had big plans for a paint job befitting the name of this rocket, but the premature shred (read on) brought an
end to that plan. Suffice to say that it would have been one you remembered. (And it still might be.)
Flight and Recovery:
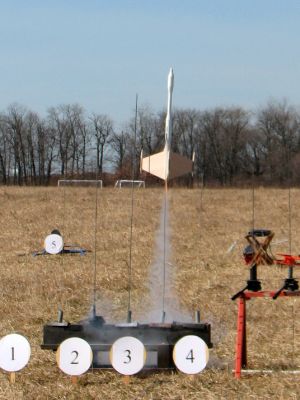
Although it took forever to arrive, the first flight was finally made at a Quark launch on a perfect Sunday in March
2007. While I had initially hoped to fly the rocket on a C5-3, I couldn't pass up the opportunity and loaded up a
friction mounted C6-3. It cleared the rod with ease and climbed several hundred feet, ejecting just as it tipped over.
Recovery was iffy, but the chute eventually opened just before the ground, which was also soft from recent rains. It
was recovered with no damage.
After the initial successful flight, several other Quarkers immediately began to suggest that I try it on an Aerotech D21. I've never used one of the 18mm Aerotech engines, nor have I seen them in use. Had I seen one, I might have changed my mind about the flight. (Then again, I might not have.)
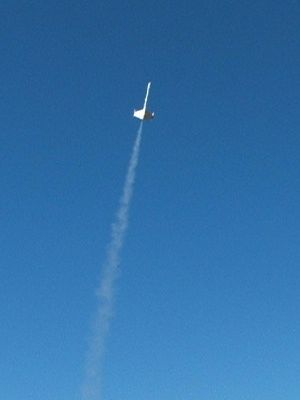
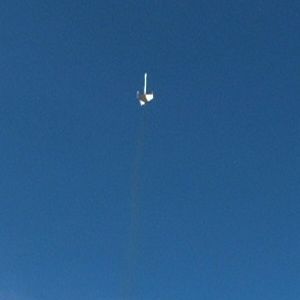
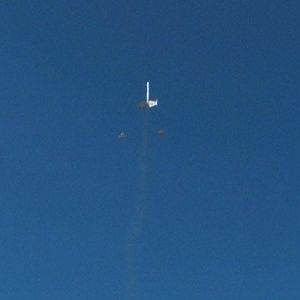
Flight number two was shorter than the first but much more eventful, and in the end, the Cosmik Debris lived up to its name. I tried to get a movie of the flight with my digital camera and actually managed to keep it in frame for the whole flight. All 50 feet of it! At the 50 foot mark, the speeding rocket became a cloud of shredded balsa and the decidedly cosmik debris began raining down onto the area around the pad. The rocket was still under thrust and flipped wildly around the sky before starting to free fall. The ejection charge fired just in time and the remains of the rocket avoided further damage. I managed to find most of the balsa, but except for some critical pod pieces, two of the fins will need to be completely replaced.
Summary:
I've since replaced the missing fins and I'm considering making this a regular on the small field circuit closer to
home. Even with a C6-3, the rocket tops out at an altitude that will bring it home safely on all but the smallest
fields. The size guarantees a crowd pleasing show with the kids who routinely gather at these launches. Now if I can
just keep it from getting trampled.
PROs: I can all but guarantee you'll be the only one at the pads with a pig like this!
CONs: I should know better than to listen to some people. ;-)
Sponsored Ads
 |
 |


