Aerospace Speciality Products V2
Aerospace Specialty Products - V2 (18mm) {Kit} (KV2-18)
Contributed by Tony Williams
| Construction Rating: | starstarstarstarstar_border |
| Flight Rating: | starstarstarstarstar |
| Overall Rating: | starstarstarstarstar |
| Diameter: | 1.33 inches |
| Length: | 11.25 inches |
| Manufacturer: | Aerospace Specialty Products  |
| Skill Level: | 1 |
| Style: | Scale |

Brief:
To this old rocketeer, a BT-55 based V-2 is the very epitome of a model rocket. It is instantly recognizable to just
about everyone as a model of an actual rocket. Estes Industries used to sell one "back in the day" (K-22),
and I've always regretted not getting one.
Fortunately for born again rocketeers and hopeless procrastinators like me...and anyone who wants to build a good looking and ever-so-flyable scale V-2, Aerospace Speciality Products sells an excellent kit designed to fly with standard 18mm motors. At $19.95 it may seem a bit "pricey" for a peanut scale model, but this is a quality kit and well worth the investment.
Construction:
My KV2-18 came in a rather nondescript plastic bag containing all the necessary parts and instructions.
There's a certain amount of pre-fabrication to it, but I'm not complaining. The balsa nose cone is pre-weighted, which is critical for stability, with a big screw eye already installed for attaching the recovery system. Also, upgraded from an earlier version of this kit, the basswood fins and servo pods are laser-cut.
Still, there's plenty of shaping and sanding to do: airfoiling the fins, rounding the edges of the servo pods, and fabricating the small pull-out plugs and turbine exhaust ports out of basswood strip.
I won't dwell on the scale aspects of the kit. Except for adding one small detail (the vent ring around the lower body) I built my KV2-18 stock, completing and checking off each step on the instruction sheet before moving on to the next one, just like a good rocketeer should. Construction was fairly straightforward. And the V-2 went together smoothly and fast, at least for a scale model.
Finishing:
In my rush to complete the model in time for the Third Annual Birmingham Blast-Off, I opted for a very simple black
and white paint scheme (one of the two shown in the kit diagrams). My masking job wasn't perfect but the model still
looks good.
PROs: Pre-weighed nose and laser-cut parts make for a faster, more accurate build
CONs: No complaints here!
Construction Rating: 4 out of 5
Flight and Recovery:
In spite of my hurry to get her done to fly at the BB-O III, a last minute work conflict kept me from attending the
meet so my V-2's maiden voyage took place several weeks later in a local pasture.
Concerned that the smallest recommended engine (A8-3) was too wimpy to adequately loft this small-but-hefty bird, I went with a B6-4 for the first flight. As an added precaution, my four foot long "Glider Rod" was used for initial guidance.
My fears were unfounded as the V-2 leapt off the pad straight up close to 100 meters [calibrated eyeball] before arcing over and deploying the chute. Descent was a little fast for my liking, but it landed in the soft grass with no damage. Honestly, there's not much room for the recovery system in a scale V-2 at this size, but I think I'm going to replace the kit's 12-inch mylar chute with a custom 14- or 16-inch Flyin' Bison plastic chute for future missions.
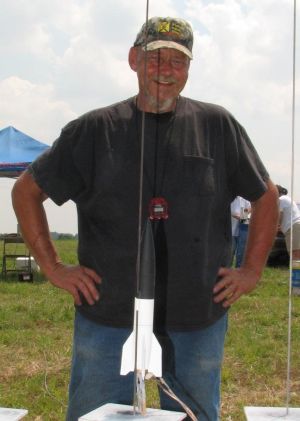
This little V-2 finally made it's public debut at the Birmingham Rocket Boys' June 2008 launch and was well received. In my haste to get in just one more flight for the day, I mistakenly prepped her with a plain (non-reinforced) 14-inch plastic chute...with predictable results. After a great flight up to about 200 meters on a C6-5, the chute ejected and promptly tore off five of the eight shroud lines. This made for a very fast streamer recovery. Thank God (and Aerospace Specialty Products) for bass wood fins--the V-2 survived intact!
PROs: Great flight on a B6-4. A C6-5 really smokes!CONs: Fast descent worried me
Flight Rating: 5 out of 5
Summary:
Every good rocket deserves a display stand. Inspired by my new V-2, I created the one in the picture(s) using a
section of a Pringles Potato Crisps can, which had been used as a construction cradle, some old poster board, a figure
left over from a 1:48 scale plastic model, vinyl lettering, and a little India ink. I also fashioned four simulated
graphite steering vanes and glued them to a piece of expended engine casing. This assembly, painted black, can be
inserted into the rear of the model for display and removed for flight.
When my son saw the V-2 display for the first time, he said (in his best 'Beavis & Butthead' imitation), "That's the coolest thing you've ever built!"
Overall Rating: 5 out of 5
 |
 |
Flights
 |
 |
C.C.N. (January 6, 2009)
Sponsored Ads
 |
 |


O.B. (August 27, 2008)