Scratch Feersum Endjinn Original Design / Scratch Built
Scratch - Feersum Endjinn {Scratch}
Contributed by Kevin Johnson
| Manufacturer: | Scratch |
Brief:
This is my EMRR Box-o-Parts contest rocket. It features 6 fins, 4 18mm motor mounts, and a unique nosecone
arrangement.
Construction:
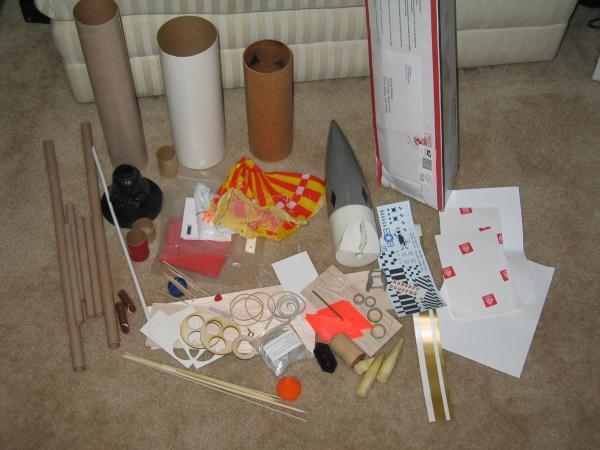
The parts from my box that I used in the rocket are:
- Big Daddy nose cone
- BT-100 tube, 12" long
- BT-80 tube, 4" long
- BT-20 tube, 4 sections 2.75" long
- 3.9" diameter phenolic coupler cut into sections
- Balsa fin set (maybe from Sizzler or Hi-Flier)
- Plastic fin set
- Bamboo skewers, 1/8" diameter by 5" long, 3
- Balsa sticks, 1/16" square cut into 1" and 1/2" sections
- Plastic Darth Vader Slurpee cup lid
- Estes 1/4" launch lug
- Balsa stock, used for centering ring and nosecone stops
- Plastic tablecloth parachute, hole reinforcements, and shroud lines
- Estes 1/4" wide rubber elastic shock cord
- Shipping box, used to laser cut motor mount centering rings
- Card stock, cut into shapes and applied to outer surface
Items added (not in box):
- Nose weight (4 Estes butter pats)
- Bolt, nut, and washer for motor retention
Construction steps:
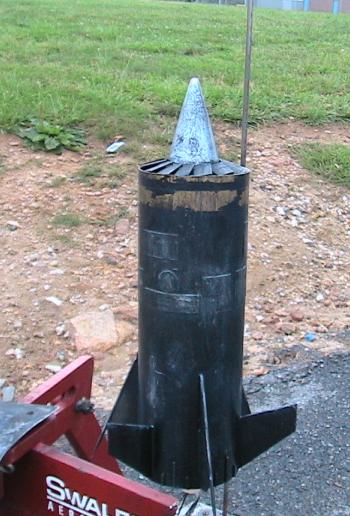 I didn't have a good match between the tubes in my box and the one large nose cone so I knew I'd have to
create some sort of adapter. Luckily, the Slurpee cup lid (once Darth Vader was cut off) provided just the part I
needed to center the Big Daddy cone in the BT-100 tube. The transition was glued to the cone with about 2 inches
exposed.
I removed the shoulder of the nosecone, and then cut a ring from the included balsa sheet to center the bottom of the cone in the BT-100. I also cut some small sections of balsa to act as stops so the nosecone would stick out the right distance from the tube.
To dress up the transition that was created at the tip of the cone, I cut rectangles out of the phenolic coupler to create impeller blades as part of the jet engine styling. These were glued to the Slurpee cup lid on an angle.
The next steps I took were to attach the fins. One set of fins were balsa and they were simply glued to the outside of the body tube. The other set of fins were plastic, and before gluing them on, I had to remove the mounting tabs that were intended to hook into the plastic fin can. To increase the visual impact, the plastic fins were glued on swept forward. I also cut the 1/8" bamboo skewers to 5" long and glued them to the leading edge of the balsa fins. This looked cool, but in retrospect was pretty dumb. I must have poked myself at least 20 times with the sharp points.
To fill in the area at the base of the rocket between the fins I cut small sections of the 1/16" balsa strips and glued them around the rear edge.
I drew a series of square, rectangular, circular and triangular shapes on the included card stock and cut them out. I then glued those shapes to the outside of the body tube in an eye pleasing pattern. The hope here would be that they would stand out from the tube enough when painted to give an interesting look to the rocket.
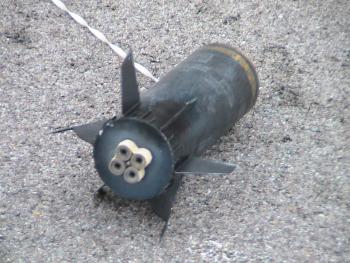
I then started working on the motor mount. Most of the other tubes in my box was either 13mm or 18mm so I knew I would have to cluster. I tried figuring a way to use the 3x 24mm mounts to hold 13mm motor tubes, but couldn't quite make it work. I didn't have enough balsa left over to make a set of rings from that, so I decided to use the box itself for the rings. A friend of mine was getting some parts laser cut, so I cut the sides from the box my parts came in and sent them along to have several 4x18mm centering rings made to fit the BT-100. Since the rings were made of corrugated cardboard, I stacked 2 rings with the corrugations at 90 degrees for strength and left them under a stack of books to dry. The mount was assembled in the usual fashion. For motor retention I added a bolt epoxied in the space between the four motor tubes. A washer and nut are used to hold the motors in place. Once the mount was dry it as glued into the aft end of the rocket.
I glued the BT-80 tube section to the top centering ring and that fed up inside the open end of the nose cone. This acts as a stuffer tube for the parachute and shock cord.
I added the nose weight, and then attached the shock cord to the BT-80 tube with a tri-fold mount made from some of the paper that was in my box. To attach the shock cord to the nose, I drilled two holes in the cone below the fan blades and tied the cord through the holes.
Finishing:
I wanted the model to have the feel of a massive piece of machinery that had been kicking around the galaxy for a
while, so I planned for a heavily weathered look. For the nose I started with a base coat of black paint. i then
brushed on an acrylic silver paint and let that dry. A top coat of black paint was brushed on then while that was wet,
I wiped the black off with a paper towel, leaving the blades looking dirty and worn. The cone was dry brushed with
silver to make it look beaten.
For the body, I wanted to carry the weathered theme over, but before starting the base coat I took the strips of gold vinyl material I found in the box and applied that to the front of the body tube. I sprayed a black base coat over the entire model, and let that dry. I picked out the card stock shapes and the leading edges of the fins in silver, then applied black over that and wiped the wet paint with a paper towel to make the streaks. For the gold stripes, I brushed on acetone and then wiped the softened paint away with a paper towel to make it look like the paint had been worn away. I wasn't 100% happy with the result so I made a wash of black paint mixed with water and sloshed that all over the body. When that had dried I dry brushed silver over the details and had a nice layered look.
One of the comments I received about the finished model was that it looked like a weapon from the Warhammer 40,000 miniature game.
 Flight:
First flight was made using 4x C6-5 motors. While prepping the motors, I realized that I didn't leave enough of the
bolt sticking out and couldn't use the nut and washer to hold the motors in. I ended up using masking for motor
retention.
I used a few sheets of Estes wadding in the BT-80 stuffer tube, then folded the parachute and placed it in the rocket. The cone slid down over the tube, and it was ready to fly.
I like to twist the igniter leads together for my clusters instead of using clip whips, so after installing the motors, I inserted the igniters and then gathered a lead from each one and twisted them together. I did the same for the remaining leads and made sure that there weren't any shorts.
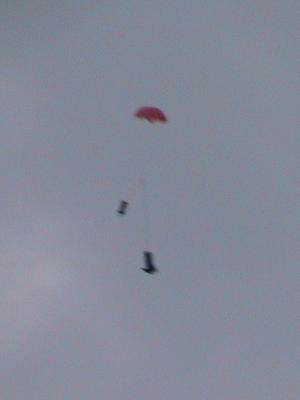
The first launch was straight and fast with a little wobble off the 3/16" rod. Ejection happened almost at apogee with a clean chute. The rocket landed on the asphalt playground with no damage.
The second flight was made with only 2x C6-5 motors. I left two of the spent motors from the first flight installed to fill the extra motor mounts. This flight was also straight, but ejection was well after apogee. The cute opened and the model drifted into a high tree.
Summary:
I think a did a good job coming up with a unique rocket based on the parts I received. I was a little limited in what
I could do because very few of my parts matched in diameter and size. I was very happy with the overall result.
Sponsored Ads
 |
 |


