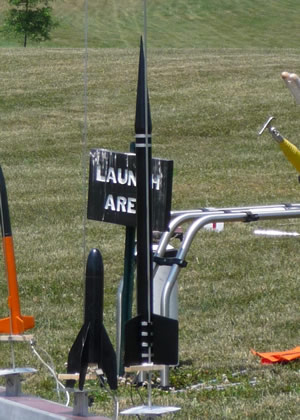
Aerospace Speciality Products Tiny Tim Smoke
Aerospace Specialty Products - Tiny Tim Smoke {Kit}
Contributed by Dick Stafford
| Published: | 2010-08-01 |
| Manufacturer: | Aerospace Specialty Products  |
(Contributed - by Dick Stafford - 08/01/10)
Brief:
This will be a short review and may not be of much use. The Tiny Tim Smoke is a rebuild of a
scavenged Tiny Tim Booster section from a staged WAC Corporal and I don't even know what kit it was. What this review
does show is how seemingly non-compatible parts can unexpectedly come together to yield an interesting rocket.
Construction:
Parts List:
- One scavenged Tiny Tim Booster
- One Quest T-35 tube
- LOC 24mm tubing
- One Quest Nike Smoke nose cone kit
- Steel fishing leader
- Elastic cord
I inherited a box of dead rockets from rocket buddy Paul Miller, who was relocating to Aridzone (that place just east of The Peeples Republik of Kalifornia). One of the rockets was a burned out (literally) Tiny Tim booster from a WAC Corporal kit that met its demise at NARAM-47 on a C11-0. The top, including the inter-stage, was fried and there was no motor mount tube. At first, it appeared the body's diameter wouldn't match any tube that I had on hand. I was thinking about adapting it up to a larger tube when I noticed that a Quest T-35 tube (1.340" ID x 1.380" OD) fit over it like a glove!
To get the T-35 to slide all the way to the fins, I had to pare one of the outer trim rings that were part of the WAC's scale detail. I also scuffed up the paint to help it bond to the T-35.
I sanded and trimmed the centering rings so I could get a new 24mm motor tube in. The top of the Tiny Tim Booster had thick ring installed, which provided an attachment point for the recovery leader. I poked a hole below the ring and looped a steel fishing leader through. These leaders are so thin that the T-35 still fit nicely.
 The only cone I had for the T-35 was one of Quest's 3-part Nike Smoke cones. I really like this
cone style. The cone consists of two halves and a conical cap.
Chris Michielssen has a good
description of the cone and how to build it. I didn't do as good a job but it still looks cool. I tied the cone to the
upper loop on the steel leader with a long piece of elastic.
The body and cone was painted gloss black to match the Tiny Tim and I trimmed the raised rings with silver vinyl tape.
Flight:
Prep included grabbing and attaching a 12" nylon 'chute, adding the dog barf wadding, and
friction fitting a C11-3. The flight was great.
Summary:
I hope this motivates you to resurrect your dead and retired rockets and rocket parts. This
was a lightning fast build and the resulting rocket looks pretty cool, if I do say so myself.
Sponsored Ads
 |
 |


