| Construction Rating: | starstarstarstarstar_border |
| Flight Rating: | starstarstarstarstar_border |
| Overall Rating: | starstarstarstarstar_border |
| Manufacturer: | FlisKits  |
 Brief:
This is a simple baffle for use in a BT60 body tube.
Construction:
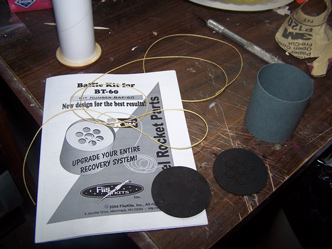
The kit comes with instructions, a Kevlar®
thread, a coupler tube and two perforated fiber disks that serve as the actual baffles.
For my upscale Vulcan project, I needed BT60 tubing longer than the 18" that comes standard from Estes. I decided to kill two birds with one stone and use a baffle for the coupler. I chose the Fliskits BAF60 Baffle since I had good luck with their BAF55 in the past.
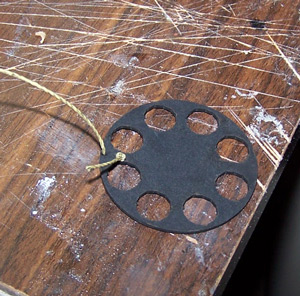
 The first step in assembly of the baffle was to thread the Kevlar®
thread through the provided hole in the after baffle plate. I've had trouble doing this before but this one fit just
fine. The Kevlar®
was knotted and then passed through a notch in the outer edge of the baffle plate so that it would pass up through the
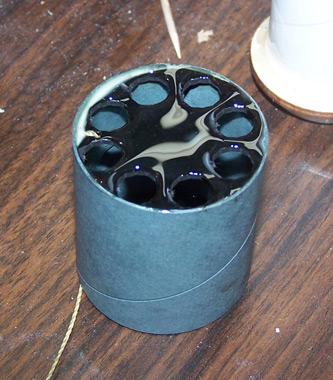
baffle. The plate was secured in place with epoxy and epoxy was "painted" over the face of the baffle plate
and the interior of the coupler to act as an ablative surface. When the epoxy had set, the Kevlar®
thread was fed through the notch in the forward plate and that was installed with epoxy as well. I spent more time
waiting for the epoxy to set up than in actually putting this thing together.
PROs: goes together easily
CONs: none
Construction Rating: 4 out of 5
 Flight:
During most the flight, the baffle had only a structural role to play. It was used as a coupler to join to tubes. In
that, it performed admirably.
Recovery:
When loading my BT60 Vulcan for its maiden flight, I debated of whether or not to include any wadding or dog barf. In
the end, I decided not to in order to see how well the chute would be protected. As it turns out, the chute was
protected but not protected enough. It exhibited numerous small holes which showed evidence of burning particles and
there were a few places where the plastic material of the chute was shredded. This was a 32" plastic chute from
Hartle Engineering. It is significantly tougher than the normal plastic chute that comes with many kits but it is not
nylon.
I cannot assign the blame for this totally to the baffle. I have had baffles of the same design and manufacture work in a smaller size. Part of the problem is that I made a concious decision to seat the baffle back much further aft that the manufacturer would recommend. This was done for structural reasons and to give room enough for the large chute needed by a fairly heavy rocket. The baffle was closer to the blast so it did not filter the particulates as effectively as it could have had it been farther forward.
For a second flight, I judged the sad looking chute to still be sound enought to support the rocket and I repacked it. This time, though, I used 3 pieces of wadding in addition to the baffle. The rocket flew fine and the chute deployed on schedule. There was no additional damage.
Flight Rating: 4 out of 5
Summary:
This baffle seems to me to be the most common design. There are others designs which may be more effective at
filtering out burning particulates in cramped conditions but this design is functionally simple and elegant. I would
have no problem recommending it in most application as long as its not sitting mere inches from the ejection charge.
It's a good product that I used in less than perfect conditions.
Overall Rating: 4 out of 5
Sponsored Ads
 |
 |


