| Manufacturer: | Rocket Vision |
 Brief:
It is possible to be involved in high power rocketry without your own pad.
Usually you fly with a club and can use the club's pads. Still there are plenty
of times when a good high power pad is a necessity. Many high power launches
ask folks to bring their own pads. I'll be proud to bring my QuadPod to any
launch. For the past year, I've looked at high power pads. I'd seen up close
the Vaughn Brothers pad, and the Yellow Jacket pad, but I settled on the
RocketVision QuadPod. I'm sure I'd be happy with either of the other two, but I
think I got the right pad.
Construction:
First, the purchasing experience with RocketVision is first rate. Their
e-commerce site is one of the nicest on the web. I was able to track the
package as it moved through their warehouse and then on to UPS. UPS did their
best to mess things up, but a quick call to RocketVision cleared it all up. I
had my pad in a little over 7 days, the week after Christmas.
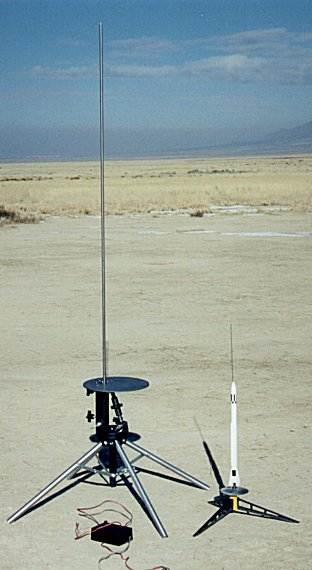
The construction is first rate throughout. Head is cast aluminum and the quality is the same as you would find on fine telescope mounts. The steel bolts holding it together look like they are sized for heavy trucks. The first word that comes to mind when you look at the blast deflector is 'millstone' it's so heavy and solid. The legs are thick tubing.
Set up is extremely easy. It's not necessary, but I remove the blast deflector since this part gets quite dirty. First I invert the pad and deploy the legs. Then I flip it over and attach the blast deflector with 4 screws. I don't consider attaching the launch rod to be set up because the launch rod gets changed quite often. The QuadPod makes this easy needing only 2 screws to be closed on the rod.
 Use:
Use:
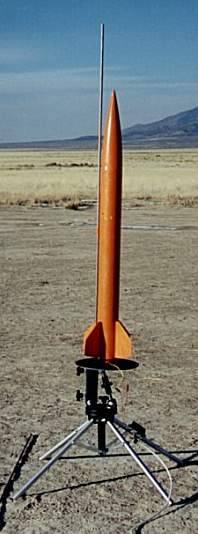
Getting the rocket on the pad is relatively easy. You pull the pin and the rod
lays down almost 90 degrees. Feed the rocket onto the rod, then lift the rod
and replace the pin. This doesn't mess up the elevation adjustment at all. This
is the only part of the operation that is the least bit awkward. The pin is a
bit hard to push in or pull out.
If you need to angle into the wind or if there's a general slope to your launch site, like it is for me, the QuadPod adjusts in azimuth (it swivels) and in elevation. Unscrew one bolt screw to release the rotating head and it swivels on ball bearings, then tighten. Adjust the elevation with the jack screw. Done. Nice and smooth.
The rod holder will even hold a 1/8" rod, but you'll need a longer rod than an Estes 1/8" rod because it will take 8" of rod to engage both screws. I've launched rockets with 1/4", 3/8" and 1/2" rods.
I also purchased a 72" x 1/2" launch rod from RocketVision. Their one piece stainless steel rods is very nice, if you can transport it. I put mine in a Subaru Legacy, not problem. I also tried a Blacksky standard rail. The rail fit into the launch rod hole. There's no need for an adapter with this pad.
Summary:
I would have no problem launching anything up through an L motor rocket off
this pad. I haven't tested it in heavy winds, but it seemed very steady. It's
sturdy, portable, adjustable and pretty. The only thing to consider is that you
lose 8" of rod in the holder, and you will most likely need a standoff of
some sort. So far, I think the best standoff I've found is a BT55 tube coupler
slipped over the rod. As a high power launch pad, I give it a 5. It's not
cheap, but this is not a piece of equipment where cheap is any sort of a
recommendation.
Overall Rating: 5 out of 5
Sponsored Ads
 |
 |
![Rocket Visions [Explicit] Rocket Visions [Explicit]](https://m.media-amazon.com/images/I/51eSFum+f0L._SL500_.jpg)


