| Construction Rating: | starstarstarstar_borderstar_border |
| Flight Rating: | starstarstarstarstar_border |
| Overall Rating: | starstarstarstar_borderstar_border |
| Manufacturer: | Mercury Engineering  |
Brief:
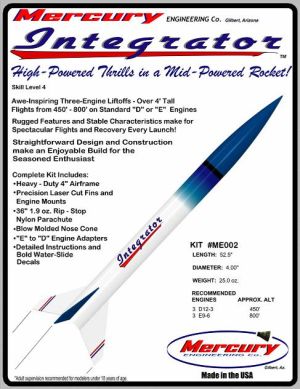
Described as "High-Powered Thrills in a Mid-Powered Rocket". This is a single-staged, 3 X 24mm cluster rocket that builds out to 52.5 inches in length with a diameter of 4 inches. A 3FNC for those who like to cluster 24mm motors.


Construction:
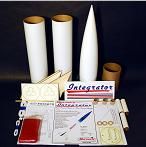
The kit, which was packaged in it's shipping box and not bagged, consisted of two 4-inch diameter main body tubes, three 24mm motor mount tubes, fiberboard centering rings, three motor retention hooks, one PVC nose cone, three 3/16-inch thick hard balsa fins, a paper sheet of fin coverings, a 36-inch red rip-stop nylon parachute, a 1/4-inch X 60-inch elastic shock cord, and an eye bolt and nut. The smaller parts were enclosed in a small plastic bag, as was the parachute.

The kit instructions, as well as the construction of the model, were all very straightforward. I used 5-minute epoxy throughout the build. The three motor mount tubes, after the hooks were inserted and secured, were epoxied together and then fitted into the centering rings. The unit was then installed into the lower main airframe tube. The fins feature a through-the-wall to the motor mount set-up. The shock cord mount was different from anything I've seen in a kit before. Picture a fiberboard disc or plate 4 inches in diameter with a half-moon cut out of one side. To the remaining material, the eye bolt is passed through and secured with a nut on the backside. Here's where I got a bit skittish. I understand the need to save weight in a rocket this size that is designed to be powered with 3 BP motors, but I strengthened this setup. I epoxied a couple of strips of 0.25" x 0.25" x 4" hard balsa on both sides (before installing the mount, obviously) in hopes of beefing it up.
Finishing:
As I mentioned in the parts rundown, the fins feature a paper covering method, one that I had not used before. And frankly, I don't know that I'd use again. The method was really very simple, but I didn't like the way they finished out. Maybe it's that fact that the root, leading, tip chord, and trailing edges of the fins are not covered, and no matter how much you try, they just don't blend in with the rest of the fin. OK, OK, maybe it's just me... The decals supplied with the kit were a bit fussy, and if you desire to replicate the manufacturer's scheme, you'll need to custom cut the fin stripes. Also, the blue-fade-to-white featured at the top of the body tube as seen on the Mercury Engineering website is not included as a decal. So, I just got out the old trim Monokote and fashioned something similar, a light blue band over a navy blue one. That combined with the white body tube, reminds me of the Toronto Argonauts uniform. (You have to follow the CFL to get that one.)
Construction Rating: 3 out of 5

Flight:
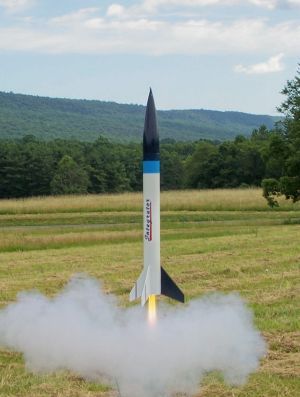
For the first flight, I used a cluster of three Estes D12-3 motors. As one would expect, the liftoff was slow--you could almost hear the rocket grunt as it tried to take to the sky. But it did, popping the parachute right at apogee. I immediately loaded the Integrator up with three Estes E9-6s. This is the way to go--forget the D12s. With the E9s the rocket had a nice, smooth, slow liftoff and attained a surprising (to me, anyway) altitude. Again, deployment was right at apogee. Very satisfying!
Recovery:
The only damage was to one of the fins--the point chord edge and trailing edges come together had some damage. However, that suspect shock cord mount held up just fine. Given the size of this model, if you do fly it on D12 and E9 motors only, I would not recommend anything smaller that the 36-inch parachute included with the kit.
Flight Rating: 4 out of 5
Summary:
When the kit first arrived and I opened the box, my oldest son looked it over with me and stated "that rocket is just screaming for a 38mm motor mount." Uh, no Junior, you're missing the point. The kit is aimed at those who want to fly a big rocket, but may be limited in space as well as budget. The Estes E9-6s give this rocket a nice ride despite its size. No special HPR building techniques are really required to build and fly the Integrator, but I have to admit, I am wondering how she'd fly on three E15-7s... The tubes, nose cone, motor mount tubes, and hooks are all first rate quality, as are the parachute and shock cord. And yes, the balsa used for the fins is of a very high quality too. If I had to build the Integrator over, I'd go with lite-ply or basswood. Just a personal preference.
Overall Rating: 3 out of 5
Other Reviews
- Mercury Engineering Integrator By jeff ybarra (May 8, 2010)
Brief: This is the same model as the 3x24 cluster edition . The difference is a single 29mm mount. If you are looking for a big rocket and big thrills that won't break the bank, your search is over. Construction: Instructions for this model were straight forward, no surprises. I used 5min. epoxy for all joints. I was unsure about the fiberboard shock cord mount.It seemed that ...
 |
 |
Flights
Sponsored Ads
 |
 |


