| Construction Rating: | starstarstarstarstar |
| Flight Rating: | starstarstarstarstar |
| Overall Rating: | starstarstarstarstar |
| Published: | 2012-09-28 |
| Manufacturer: | Scratch |
| Style: | Multi-Stage, Payload, Clone |
Brief
The Avenger wasn't the first two-stager I'd ever built, (that would be the Beta,) but it was the first one I ever flew as a two-stager. When I got back into the hobby in 2001, I quickly realized that much of what I wanted to build from my 1977-80 heyday no longer existed. My solution to this was to buy an Estes Builders Special, only to find that it had become a corporate garbage can over the years. One thing that was included in the box was a vaguely familiar transition, which I was able to identify as the TA-5055 used in the Estes Avenger. With the exception of the nose cone, everything I needed to clone the Avenger was included in the Builders Special, which almost made it worth the purchase price. Almost.
Components
- BT-50H payload tube
- BT-55V upper stage body tube
- BT-55J booster body tube
- BT-20J engine mount tube
- BT-20M engine mount tube
- 3 JT-55C tube couplers
- 4 RA-5055 centering rings
- EB-20A engine block
- 3/32" balsa fin stock
- 1/8" balsa fin stock
- TA-5055 balsa adapter
- BNC-50Y nose cone
- Small screw eye
- 36" length of 1/8" sewing elastic
- 2 medium snap swivels
- 18" parachute
- Launch lug
Construction
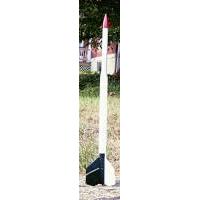
Unlike most of my rocket builds, I made sure to closely follow the instructions for the Avenger. After all, this was going to be the first two-stager built to fly as a two-stager and I didn't want to screw it up. It turned out great, mostly because I followed the instructions closely. The two different sizes of fin stock were unusual, but since both 3/32" and 1/8" were included in the Builder's Special, I was covered. I initially used a spare BT-50 nose cone for the project, but later bought the correct one from Semroc. Looking at this rocket now, it's easy to tell the era that it was built in. I had discovered Elmer's Fill & Finish, but had yet to replace the tri-fold paper shock cord mount with Kevlar.
Finishing
Despite no Kevlar in the recovery system, it's fairly obvious that I had discovered the benefits of Elmer's Fill & Finish for this project. The fins and body tubes show no traces at all of any tube spirals or balsa grain. Not to blow my own horn, but I really did a nice job on the finish for this bird. I wish I had that kind of time/patience these days.
I went with a catalog finish for this rocket, black and white sustainer and booster, silver transition and payload, and red nose cone. All paints were Valspar. The wrap decal came from an early Excelsior assortment, likely my first order from them.
Flight
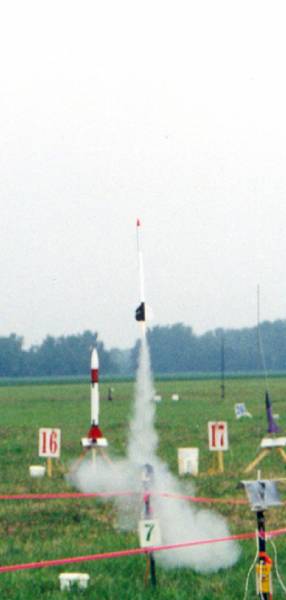
The first flight for the Avenger came at one of the original QUARK fields, the Countryside YMCA in Lebanon, Ohio, on a B6-0/B6-6 combo. This was in the pre-digital photo days, so no picture exists from the flight, but I remember it pretty vividly. I taped the booster and sustainer motors together with a wrap of cellophane tape, then friction fitted the motors into the sustainer with masking tape. The Avenger lifted off and was still fairly low when it staged. When it worked as advertised I thought it was the coolest thing I'd ever seen a rocket do, and judging by the cheers, I wasn't the only one. (It still ranks in my personal top five.) The booster fluttered down and the sustainer finished the flight perfectly, landing near the pad in the dead calm weather conditions.
The next two flights were at NARAM 43 in Geneseo, NY. With such a big field to work with I made two flights on Saturday with the C6-0/C6-7 motor combo. Both flights boosted straight up, then windcocked to the right as they staged. Like almost all of my flights that weekend, the first Avenger flight landed in the cornfield, but close enough to see from the edge of the field. (I found two other lost birds as I walked in after the sustainer on the first flight, so someone left happy.) The second one windcocked more severely than the first, going horizontal as it staged, possibly because the booster didn't separate cleanly. I'd initially written it off, but found it at the far right edge of the field after a long hike. I celebrated finding it with a Black Angus burger that a local scout troop was selling. Doesn't get much better than that.
Subsequent flights were at Voice Of America park, where I had a square mile to work with on recovery, so I flew it a lot as a C6-0/C6-7 bird.
Recovery
Recovery has been handled from the start by an Estes 18" parachute. After the long drift at NARAM 43, I reefed the chute at the suggestion of one of the guys we parked by, and I never had anything of a problem with excessive drift since then. I was a bit aggressive with the knife, so the chute is more reef than actual chute, which has caused some laughs from my fellow fliers.
Summary
Pros: The Avenger is multi-staging done right. Great classic lines and a fantastic performer.
Cons: Long OOP. (But easily cloned.)
Other Reviews
- Scratch Avenger By William Beggs (October 29, 2007)
Brief: This is my attempt at designing and building a retro Spaceship that closely resembles one of the displays that CoolRockets has. The one I decided to replicate was the “Streamliner”. Since this is my first time attempting this I figured this design was fairly basic. The name I have given mine is the Avenger. The materials include: 1/16” Balsa for fin set, ...
#Related Reviews
Related Products
 |
 |
Flights
Date | Flyer | Rocket | Altitude |
|---|---|---|---|
Sponsored Ads
 |
 |


