| Construction Rating: | starstarstarstarstar |
| Flight Rating: | starstarstarstarstar |
| Overall Rating: | starstarstarstarstar |
| Diameter: | 1.53 inches |
| Length: | 16.88 inches |
| Manufacturer: | Squirrel Works  |
| Style: | Sport |
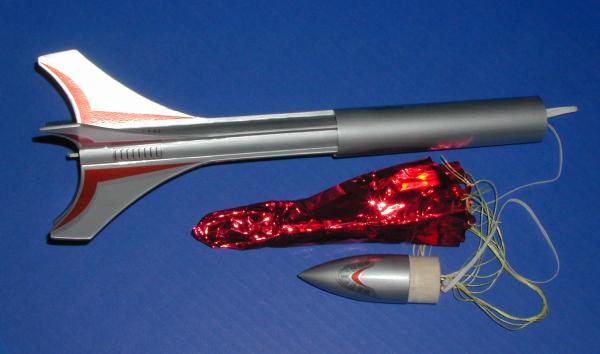
(08/31/05) When I picked up the Squirrel Works Vulture, I grabbed the Astrid as well. This rocket is another from their sci-fi series of rockets. What makes this rocket so neat looking to me are the 5 fins that are elongated up half the body length and into the upper body tube section. It gives the rocket a very unique look.
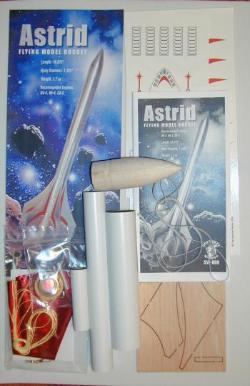
 The kit is packaged professionally and includes a 8" long, .976" diameter lower body tube, a 6" long, 1.325" diameter upper body tube, and a 3" long balsa nose cone. The fins are laser-cut balsa and each fin is made up of two pieces. There is motor tube with cardboard centering rings, thrust ring, and a motor hook. There is an eye-screw to attach the 36" long, 1/8" wide elastic shockcord to and a 12" mylar parachute. A decal sheet is provide to complete the make up of the kit.

CONSTRUCTION:
The instructions are printed on a multi-folded sheet of pager. They include illustrations for construction and pictures for kit contents and decal placement. The tube marking guide and 3-fold paper for the attachment of the shockcord are cut out from the instruction sheet. Instructions are logical and easy to follow.
The Astrid is just a tad more than a 3FNC rocket and is fairly easy, especially with the clear instructions. It would probably fall into a skill level 2 (from Estes and Quest standards).
The assembly of rocket consists of:
The motor tube is assembled. You will need a strip of masking tape to hold the center of the motor hook to the body tube. The two centering rings are added along with a thrust ring.
The next step is to mark the body tube. The marking guide aligned well.
 The laser-cut fins are then attached. The main fin is glued into place on the fin lines and then the extension is glued into place. This method worked well.
Once the fins are in place, two plywood, laser-cut centering rings are glued to the top of the lower body tube. One is placed up against the fin extensions, while the other is at the top of the tube.
The nose cone is balsa and was turned nicely. Perhaps a slightly higher grade of balsa? The eye-screw is attached to the bottom of the nose cone. This is where the 36", 1/8" wide elastic shockcord is attached.
The launch lug requires a laser-cut balsa standoff to align to the upper body tube's diameter.
Squirrel Works goes on to give instructions on assembly of the parachute and attachment to the nose cone (via an eye-screw) and the body (via 3-fold paper method). The parachute is 8-sided mylar and uses Kevlar shroud lines.
They also give basic finishing instructions and then detailed instructions on placement of the provide water-transfer decals.
By now, everyone should know how I finish rockets, so no real news here. I used my typical multiple coats of Plastic-Kote Primer and sanding in-between. The nose cone was typical balsa and took several coats to fill in the grain. The unique fins also took extra care in sanding to have a nice smooth finish. I then used Walmart Silver paint (additional comments about Walmart paint).
 Squirrel Works provides some nice water-transfer decals that took time and care to apply. They really enhance the looks of the rocket.
After a week, I gave the rocket a coat of Walmart Clearcoat. I do this for two reasons: 1) Silver paint stains easily from hands and fingers, and 2) to seal the decals. Unfortunately with the decals the clearcoat highlights them because of the smoothness of them. What can ya do?

Overall, for CONSTRUCTION I would rate this kit 5 points. An very nice and enjoyable build. No complaints.
 FLIGHT/RECOVERY:
Squirrel Works recommends the B4-4, B6-4, and C6-5.
Squirrel Works indicates the finished rocket should weigh 1.7 ounces. My finished rocket weighed 1.6 ounces.
Don't know why Squirrel Works doesn't recommend the A8-3, or the Quest A6-4 but I went for it for my first flight.
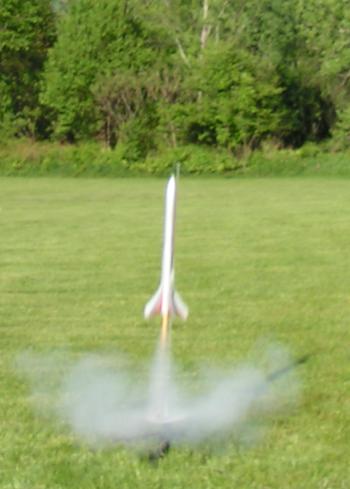
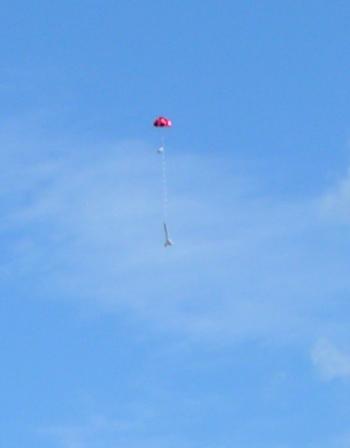
My first flight was in my front yard, so I didn't want to do anything too drastic. I loaded it with a Quest A6-4 and packed it with 4 pieces of wadding. On a perfectly calm day, the launch was perfectly straight and there was no spinning on the way up (I must have gotten all 5 fins straight). It arced over and seemed to sit there for a second then the eject occurred. The parachute opened and it floated down nicely. The descent rate is nice, but a tad slower than what I usually go for. I will either reef the parachute or cut a spill hole to increase the rate.
Based on this flight, I would recommend the A6-4.
 My second flight was on a B6-4. It is a light rocket and so it came off the pad fast and flew very straight and stable. The Astrid was still going up when ejection occurred. The red parachute size and color provide for a good descent. I ran and caught it before it touched the ground. (Doesn't everyone try to do that?)
For FLIGHT/RECOVERY, I would rate this rocket 5 points. The Astrid's flight and recovery system is top notch.
I give the rocket an OVERALL rating of 5 points. The Astrid is a futuristic rocket with great parts, instructions and decals. It flies well and has a solid recovery system. Hard to find anything wrong with it. Granted, I'm basing this on two flights which I typically don't do, but really, it would be hard for me to believe to expect anything except repeats of the first flights... just perhaps higher on bigger motors!
Other Reviews
- Squirrel Works Astrid By Chan Stevens
Brief: For anyone looking for a break from the 3FNC standards, try moving up to this 5 finned beauty. With its futuristic style, colorful decals, and funky fins, it qualifies as a fun kit to build and fly. Construction: Parts are of above average quality, and include: 1 BT-55 upper body tube 1 BT-50 lower body tube 1 BT-20 motor tube (with metal hook) 1 Balsa nose ...
 |
 |
Flights
 |
 |
D.M. (June 21, 2008)
Sponsored Ads
 |
 |


D.M. (June 21, 2008)