Art Applewhite Rockets Hourglass 24mm
Art Applewhite Rockets - Hourglass 24mm {Kit}
Contributed by Bill Eichelberger
| Construction Rating: | starstarstarstarstar |
| Flight Rating: | starstarstarstarstar |
| Overall Rating: | starstarstarstarstar |
| Manufacturer: | Art Applewhite Rockets  |
 Brief:
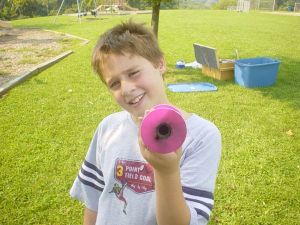
This odd-roc is an hourglass-shaped, incredibly (and some might say surprisingly) stable, small field flier. Very easy to build and entertaining to fly.
Construction:
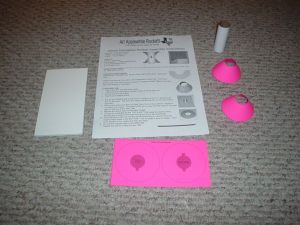
The parts list:
- One brightly colored pattern sheet (hot pink in my case)
- One sheet of foamboard
- 24mm engine tube
- Engine hook

I wasn't quite sure what to expect when I found that I'd be reviewing this product, but shortly after finding out, I was sitting on the floor in the family room with my building tools strewn out around me. Had I not been aware of Art's reputation before starting construction, I may have had some reservations but I've been eyeing his saucer rockets for a while and had kept up on the reviews of his other products. Art's saucers, cones and other assorted flying shapes are supposed to be easy to build and fly and apparently all of them deliver. I expected nothing less from this one.
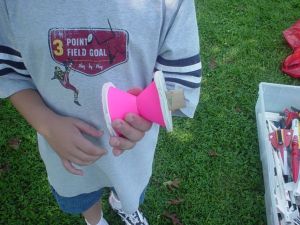
Instructions were well detailed and illustrated and mention right off the bat that you should READ THE INSTRUCTIONS BEFORE STARTING CONSTRUCTION! Do it. You'll be glad you did because this isn't like any kit you've previously built. (Unless, of course, you've previously built a 24mm Hourglass rocket!) Despite the fact that it was Friday and I wanted to launch it the following Sunday, I paid special attention to his construction tips, especially "Take your time and pause between steps to let the glue dry". With that advice heeded, I spent Friday night cutting out the cardstock parts, wrapping the cones, and gluing the top and bottom patterns to the foamboard backing. I used a thin layer of Elmer's Wood Glue to attach the pattern to the  foamboard, then left it to sit under some bookends overnight. On Saturday morning I was able to cut the top and bottom pieces out and proceed with the rest of the project. It went together quickly from this point. I used cellophane tape to hold the top and bottom cone pieces in the shape I wanted them, then used gel CA to close them up in a more permanent fashion. The stories about me gluing myself to said cones are just rumors. (I'll eventually get even with my wife for spreading them. And for laughing.) After this, it's just a matter of making sure the launch lug holes line up and checking your glue fillets. I could have flown it before lunch if I wanted to.
Finishing:
Finishing? What's your pleasure? If you don't answer sanding, sealing and painting, then this is the kit for you. My Hourglass was a high visibility hot pink and I had no intention of messing with it beyond spraying the hot pink parts with a coat of clear. I guess you could use a permanent marker to personalize it, but I just kept mine as it was intended. I may start marking each flight with a slash (ala the notches in a gunfighter's pistol grips,) but other than that I'll just let it age gracefully.
Construction Rating: 5 out of 5

Flight:
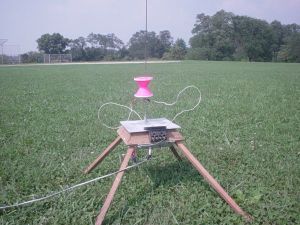
Flight #1 was on a conservative engine choice, the Estes C11-5. The field we were flying on is a nice, flat group of four baseball fields, but the area is also ringed with trees and homes, so I went the conservative route. I needn't have worried. The rocket boosted straight up to a height of maybe 150-200' with lots of noise and smoke announcing our presence to a group of Labor Day partiers in a nearby backyard. At ejection it began flipping and tumbling back to earth, landing on the hard packed dirt of one of the ballfields. There was some slight damage incurred when the bottom foamboard circle hit the infield but it was only a slight bend and I didn't think it would cause problems.
Since the C11 flight had done so well, I decided to go with my lone D12-5 for the second flight. This flight was a carbon copy of the first, though somewhat higher. The difference with this flight was at ejection, when the motor's extra healthy ejection charge caused it to partially blow past the rear of the engine hook. (One of several ejection charge difficulties we encountered on the day.) Once again, the neighboring drunks had something to say at the sound of the ejection charge, but they sounded pretty potted despite the early hour and I didn't anticipate any trouble from them.
Flight #3 was again on a C11-5 and was just like the first, but with a softer landing. We stopped at this point but only because of the heat and humidity. (And the fact that a bunch of our OTHER rockets had been damaged by the aforementioned overenthusiastic ejection charges in the Estes engines.)

Recovery:
Recovery can be tough because you sometimes have to walk as much as fifty feet to retrieve the Hourglass. (What is this world coming to?)
Flight Rating: 5 out of 5
Summary:
The Hourglass rocket is a fun project that builds quickly and results in a great performer for a small field near you.
PROs: Has the potential to be an overnight build and fly. Unusual looks. Impressive performance that never gets out of your line of sight.
CONs: Had trouble color coordinating my outfit with the hot pink. (In other words, NONE!)
Overall Rating: 5 out of 5
Other Reviews
- Art Applewhite Rockets Hourglass 24mm By Dick Stafford
Brief: Art’s latest product line is the Hourglass. The Hourglass rockets resemble spool rockets. They have top and bottom circular plates with two cones between the plates providing the hourglass shape. They are currently available in 13mm, 18mm, and 24mm sizes with all sizes coming in several colors. This review is for the 24mm versions. The shorter version uses Estes D12 length ...
 |
 |
Flights
 |
 |
 |
 |
D.S. (September 26, 2004)