First Flight Hobbies Semi-Sonic
First Flight Hobbies - Semi-Sonic {Kit}
Contributed by Dick Stafford
| Construction Rating: | starstarstarstarstar_border |
| Flight Rating: | starstarstarstarstar_border |
| Overall Rating: | starstarstarstarstar_border |
| Manufacturer: | First Flight Hobbies  |

Brief:
The Semi-Sonic is a sleek 18mm rocket that sports three split-fins (6 fins total) and a long balsa nose cone. Mine
was a beta test-build, so some minor details may vary.
Construction:
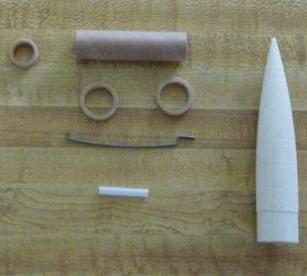
The nose cone came pre-weighted with a hefty eye-bolt. This is a good way to ensure stability while sacrificing very
little building. The kit comes with balsa fin stock, requiring the user to cut the fins using the provided template. I
personally don’t mind cutting balsa. The motor mount is typical – a tube, two centering rings, a motor block
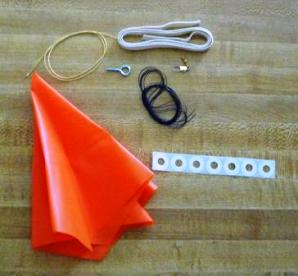
and a motor hook. The recovery system includes a Kevlar®
leader, elastic cord, and a swivel. The chute is thick plastic and may be a Hartle Engineering Chute Skinz product.
The instructions are clear and include plenty of diagrams. They are written for the beginner but even an experienced builder will appreciate them.
Construction begins with the motor mount. Its assembly is typical and I won’t bore you with the details.


The kit includes fin templates and a tube marking guide. The beta-instructions didn’t instruct the builder to fill the fins prior to attachment. I don’t know if the final version does or not, but I recommend that they be filled at this point.
 As I mentioned, the cone is pre-weighted. The eye bolt is attached to a dowel that is left over from the
cone's fabrication. This is a good thing and will ensure that the eye bolt doesn’t pull out. As noted in the
instructions, the cone’s shoulder is a bit large and is sanded to a perfect fit by the builder.
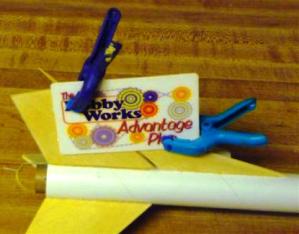
I attached the rear fins using the prescribed double glue joint. After these set, I taped a toothpick to their leading edge to ensure uniform spacing. I applied the double glue joint to the front set and clamped a plastic card (credit card sized) across the rear and front fins while the latter were drying. The result was that the two sets of fins are uniformly spaced and are perfectly in-line with one another.

Assembling the parachute was typical, consisting of attaching sections of string using provided tape discs. The material used is more durable than your standard Estes ‘chute.
Finishing:
The instructions provide good guidelines that will result in a really nice finish. I sealed mine with
fill’n’finish and a coat of white primer. I then painted it as shown with Testors spray paint. I found a
suitable decal stripe from an unknown source.
Construction Rating: 4 out of 5
Flight:
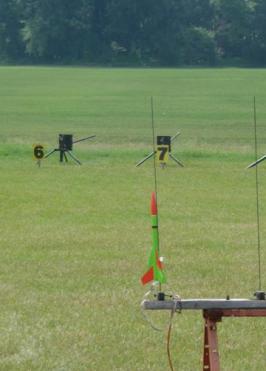
 On flight day, I found that I hadn’t packed the provided ‘chute so I found an old Estes 12”
chute in the range box. For its first flight, I loaded a Quest ‘long burn’ C6-5. The flight was really fast
and I couldn’t see the ejection event. For the second flight I used a Quest B6-4. This time, ejection was right at
apogee.
Recovery:
The 12” chute was way over sized (my issue, not the kit's)and the C6 flight resulted in a long walk even with
mild winds. Despite having added tape to the Kevlar®
leader where it met the body tube, there was a slight bend on the leading edge of the tube. Not a zipper, just a ding.
First Flight said they were increasing the length of both the supplied Kevlar®
and elastic cords. The walk after the B6 flight was short and there was no additional damage.
Flight Rating: 4 out of 5
Summary:
Pro's
- The sleek split-fin looks and long nose cone. Looks great!
- Includes a Kevlar® leader, swivel and motor hook
- I like the provided 'chute over standard plastic.
- Sturdy NC attachment point (would be more important on a larger rocket, but I've had plenty of screw eyes yank out a big plug of balsa).
- Pre-weighted nose (a good quality assurance feature).
- I liked the discussion in the painting and flight sections. Good for newbies.
Cons
- Very minor, but the balsa finish is not as clean as, say, Semroc. Filled fine, however.
- Parts fit (cone and rings) is not as perfect as some others.
Neutral (some will think this is a PRO and others a CON)
- Cut your own fins vs. laser cut
My thanks to First Flight for providing the opportunity to test this cool little kit!
Overall Rating: 4 out of 5
Other Reviews
- First Flight Hobbies Semi-Sonic By John Lee (October 23, 2009)
Brief: LPR, Sleek, 18mm, Parachute Recovery I was fortunate to be asked to test out a new rocket from First Flight called the Semi-Sonic. Mine was a pre-production model. It arrived in a hanging bag with all parts and instruction included and neatly bagged. It is a sleek looking design which has two sets of 3 fins, one mounted just before the other, that gives a visual impression ...
 |
 |
Flights
Sponsored Ads
 |
 |


