Scratch Upscale BLU-97B Cluster Bomb Original Design / Scratch Built
Scratch - Upscale BLU-97B Cluster Bomb {Scratch}
Contributed by Dick Stafford
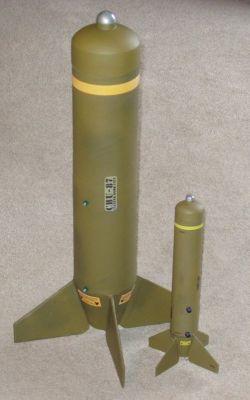 Brief:
This is a description of my upscale of the
Estes BLU-97B Cluster Bomb.
With the success of my last Quaker Oats rocket, the
Fat Oat Cholesterol Buster, I decided that a semi-scale version based on two
5" bins would provide a nice flight on Gs.
Construction:
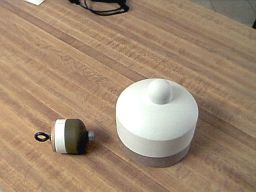
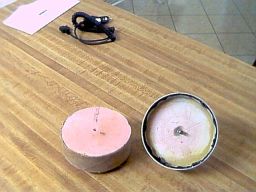
The nose cone tip was turned from 2" pink Styrofoam using a hand drill clamped in a vise. I first cut circles top and bottom with my Rotozip, and because the cuts didn't reach through the foam, finished up with a hand saw. A metal bolt epoxied into the core provided a sturdy attachment point for the drill. This worked better than a wooded dowel and I knew I'd need to add nose weight anyway. To extend the cone slightly, I cut a 3/4" circle from the bottom an oat bin. I glued this to the bottom of the cone. At this point, I coated the cone (without the plastic insert) with a layer of West epoxy. The 'nipple' portion of a cone is a plastic cap from something-or-another (it's been laying around too long for me to remember what).
The shoulder is another foam disc encircled with a piece of an oat bin. I did not glue these sections together until I completed the rest of the rocket and determined how much nose weight was required. The required weight was determined by adjusting the CG of the completed rocket, including the motor and chute, based on the Rocksim model. The weight was provided by a long eye-bolt and several nuts. This eye-bolt is slightly off-center, and extends through the shoulder section and into the top of the nose. The two halves were epoxied together and the center hole was filled with some epoxy, some lead shot (just for insurance), and more epoxy.
I built the through-the-wall fins from foam board and framed them with wood dowels. I wanted to keep the bottom light, and there will be plenty of room for a BIG chute. Having the fins extend below the end of the motor tube allowed me to clamp them together in pairs with a plastic ruler, which helped with their alignment.
The rear ring is a 29mm x 2.5" centering ring and has a T-nut to accommodate a motor clip. I added some pieces of foam board to fill the void in the rear of the body tube (remember the lower ring is offset into the tube a bit) and to extend past the end by 1/4". These pieces of foam board were beveled to provide support for the tail cone sections. I also ran strips of foam board along the line where the tail cone sections will meet the fins, forming a narrow shelf. The tail cone sections themselves are 1/64' plywood attached with Perfect Glue, Type 2 (similar to CA).
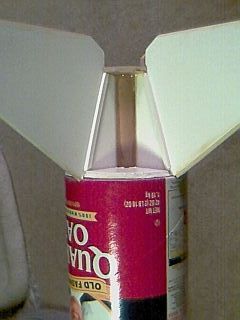
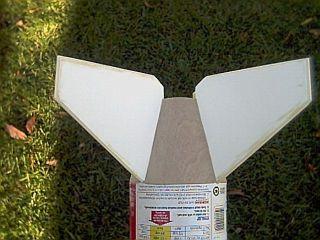
To connect the two sections of 'body tube', I made a tube coupler from another oat bin. This was split length-wise, a section removed, and the ends were glued back together to from a coupler tube. Since the oat bins are not very strong, I treated the inside of the top edge with CA, and built a makeshift anti-zipper device from small-cell bubble wrap and cloth tape. This was attached to the Kevlar® cord where it would hit the tube at deployment.
One fin buckled slightly after the first launch (see flight section) so I reinforced the fin joints with carbon fiber tape. A yard of this stuff cost more than the rest of the rocket, but on a whim, I decided to try it. On good thing about this tape is that the lengthwise edges are woven closed so they will not unravel.
Finishing:
The rocket was painted with Testor's flat olive drab and the tip was painted
silver. I made upscale decals (actually stickers) from Avery full-page label
stock. This material is not as nice a real decals, but I over-ran my budget
with the carbon tape.
Flight:
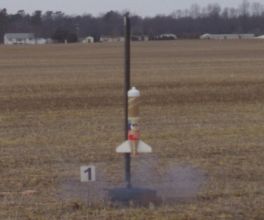
I rocket was unfinished (nekkid, that is) for its first flight. I loaded a huge
car airbag heat shield and a big 60" Giant Leap chute on one end. The
other end got a G80-7, a clamp-on thrust ring, and a clip retainer.
There was minimal weather cocking despite the strong, 15 mph winds.
Recovery:
My anti-zipper device worked fine and there was no sign of zippering. The
60" chute made for a slow descent. Unfortunately, the strong winds
provided a high lateral velocity. One fin suffered minor damage, thus
necessitating the reinforcement of the fillet areas. I knew I shouldn't have
flown it in those winds, but if I drive for 2 hours, I'm going to fly
something!
Summary:
I like the unique look of the cluster bomb, I love short fat rockets, and I
enjoy making rockets out of junk, so what's not to like about this upscale? The
main downside is the foam board fins. Plywood would have been stronger but it
would also have been heavier, although maybe not after I had to add
reinforcement.
If you look at the attached flight log(s), you may notice the rocket is nicknamed Janet Jackson. This nickname was added after a comment from sandman on The Rocketry Forum. I will leave it up to the reader to guess the significance of the name (looking on TRF is cheating).
 |
 |


