| Construction Rating: | starstarstarstarstar |
| Flight Rating: | starstarstarstarstar |
| Overall Rating: | starstarstarstarstar |
| Manufacturer: | Red River Rocketry  |

Brief:
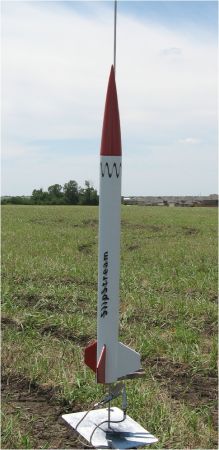
I was provided with my SlipStream for beta testing. It is reminiscent of the Cherokee-D, only shorter and with
different fins. Oh, and it uses 18mm motors, not 24mm. Uh, maybe it really isn't that similar! Well, the nose cone and
body diameter is the same. It is a BT-55 based rocket complete with a nice sheet of waterslide decals, balsa nose cone
and flies on 18mm motors. The rocket is just over 19 inches tall, weighs less than 2 ounces and recovers on a 12-inch
red mylar parachute.
Construction:
The instructions are numbered with lots of helpful illustrations. The three fins are laser cut balsa and the balsa
nose cone is top quality and very smooth. A standard 18mm motor mount is installed with two lite-ply centering rings
and includes a standard engine hook for motor retention and kraft thrust ring. A Kevlar®/1/8"
elastic shock cord is included, along with a 1/8" launch lug, eye screw and waterslide decals. A marking guide and
steel washer for nose weight are also provided.
Construction is standard. You can easily put this together in an hour or two, especially considering the fins are laser cut. They easily pop out of the fin sheet and require minimal sanding. Install the motor mount, mark fin placement using the provided template, and glue them on. That's most of the effort. I constructed the entire rocket with yellow glue, and the only modification was the method of attaching the shock cord. Rather than use John's standard method of attaching the Kevlar® to the motor mount, I installed my typical paper shock cord attachment. To minimize abrasion from the Kevlar® against the body tube, I soaked in CA around the top 1/2" of the body tube and tied a knot in the Kevlar® to meet the lip of the body tube. The launch lug is cut in half and installed onto the rocket. Install the washer onto the base of the nose cone and insert the eye screw and you're almost done. Finally, construct the pre-cut mylar parachute and attach the shock cord and you're ready to fly.
Finishing:
The balsa nose cone required very little finishing. With only a very light coat of Elmer's Light Fill 'n' Finish, the
nose cone was very smooth. The body tube and fins were also finished using Fill 'n' Finish. I sprayed the entire model
with a light coat of Kilz to seal off the glue and provide a solid base coat. Next, I lightly sanded the entire model
with 240 grit sandpaper and then sprayed on a coat of primer. Next, sand and primer, and sand and primer again, sanding
with 400 grit sandpaper. I followed the paint scheme on the face card using red and white Krylon enamel paint. After
drying for 24 hours I applied the decals and then covered everything with a thick coat of Future Floor Finish.
Construction Rating: 5 out of 5

Flight and Recovery:
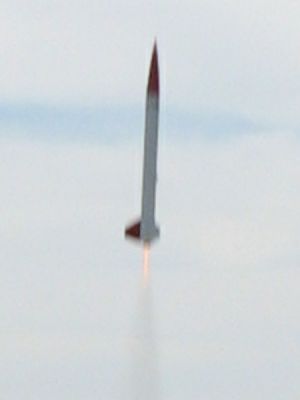
First flight was on an Estes B6-4 with the wind speed at about 8-11mph. The flight was perfect with ejection just
past the top. The 12-inch chute was perfect for the model. The next flight was very similar, except using a C6-7 for a
lot higher altitude and ejection right at the top. It was a pretty long walk to pick up the model though.
Flight Rating: 5 out of 5
Summary:
The SlipStream is a great rocket and the decals are very cool! Parts quality is superb, and you can easily build the
rocket in a couple of hours. It really zooms, too!
Overall Rating: 5 out of 5
Other Reviews
- Red River Rocketry SlipStream By William Carpenter (August 9, 2009)
The SlipStream from Red River Rocketry is a nice 3FNC rocket. I like the look of it, and it was an enjoyable build. This was my first low power rocket in a while, and it was nice to build something small and simple again. The SlipStream would be a good first rocket and makes for nice flights at the local soccer field or park. Reaching almost 800' on an Estes C6, or only 150' on an A8, this ...
 |
 |
Flights
 |
 |