Art Applewhite Rockets Helix (18mm)
Art Applewhite Rockets - Helix (18mm) {Kit}
Contributed by John Lee
| Construction Rating: | starstarstarstarstar |
| Flight Rating: | starstarstarstarstar_border |
| Overall Rating: | starstarstarstarstar |
| Manufacturer: | Art Applewhite Rockets  |
Brief:
The Helix is an innovative and simple monocopter design from Art Applewhite. It is extremely simple to build and goes
together quickly. Its also a hoot to fly.
This 18mm variant is the largest of the series which can be built "right out of the package". The 18mm Double Helix and above require a small amount of sawing. This one requires only a razor knife for construction.
I was lucky enough to get to watch the flights of the prototypes as Art was developing this line and now it seems like he is the source of a monocopter renaissance. It's a lot of fun.
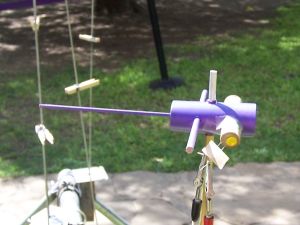
The components for this kit consist of a pre-marked body tube, a motor tube, a 1/4" launch lug and a balance beam and a basswood wing. Also included are thorough instructions on building the rocket and instructions for a simple launching pad. This one is not meant for an Estes setup.
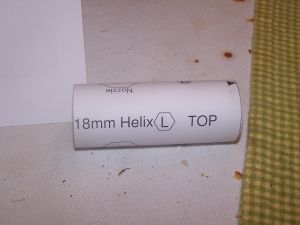
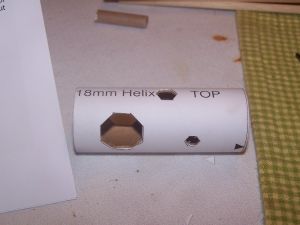
The body tube, such as it is, is marked by the simple expedient of being wrapped by a sheet with all of the relevant locations indicated by polygons of the appropriate size.
Construction:
This kit comes with instructions on both the monocopter and the building of a suitable launch pad. Besides that, it
contains the body tube, launch lug, balance beam and wing.
The first step in construction is to cut out the polygons on the body tube. This is done with an #11 X-Acto knife and the blade needs to be a new one. The method recommended in the instructions and, which worked quite well, is to push the blade in perpendicular along one line of a polygon, slowly push it in until the blade completely covers one line segment, remove the blade and repeat as needed until all sides are cut out.
When the pieces are in, they need to be adjusted for symmetry; all of the pieces need to be centered. With that done, a fillet of white glue is applied inside the BT to the visible parts of the intersections with the motor tube. With that done, all of the protrusions can be filleted with white glue on the outside.
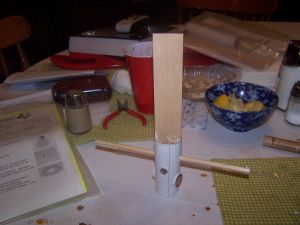
The last item to be installed is the wing. It is made from a precut piece of basswood. You can round the edges if you like but I did not. I slipped it in the marked end of the BT. It will slightly deform the tube but that is expected and explained in the directions.
Alignment is not a problem. A filled triangle marks the point on the BT which should be aligned with the center of each side of the wing. Then it is just a matter of making sure it is sitting perpendicular, something aided by having its end sit flush on the balance beam. The wing is then glued into place with white glue.

Finishing:
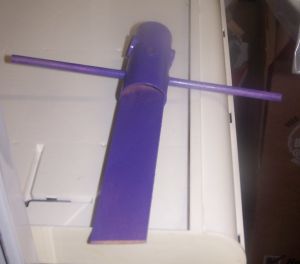
The instructions recommend a couple of light coats of sealer or a light coat of paint. Since I was building this for
a demo to some elementary school kids at the local museum, I elected to go the paint route and chose purple. I gave it
just one good coat. The instructions warn against using too much and throwing off the balance.
I am happy with the result. The text from the BT can still be read under the paint, but then again, it's nice to have little reminders such as which side is the top.
Construction Rating: 5 out of 5
Flight:
As I mentioned above, this one was built for a demo to an elementary aged group at the local museum. For the same
exhibition, I also built a 13mm Helix and a 13mm Double Helix, both of which worked great. The "field" we
launched in was exceptionally small and bounded by the San Antonio River, several buildings and many huge magnolia
trees. I figured the chances of retrieving any given rocket at just 50% with even small motors. That was about right.
Since I had already given successful demos with the 13mm variants and since this was my first foray into monocopters of any description, I decided to go wimpy with a 1/2A6-2, just to see what would happen. It was...interesting.
The motor ignited and the Helix immediately began to spin, just as it was supposed to do. It climbed its way the entire length of the 3 inch long launch rod and promptly ran out of thrust. It then tumbled to the ground. Nobody was bothered by any of that fruitless need to tilt the head up and watch all the action: it all took place right in front of everybody. With a straight face, I managed to tell everyone that it was a "successful and easily viewable example of a monocopter flight profile."
After that, the kids were anxious to start launching the rockets they had built and the demo rockets were put away.
I would not recommend using the 1/2A although I think the use of an A for demo purposes would be entirely justifiable. A Quest A6-4 with its nice smoke trail would be a good choice. For performance, stick with Bs and Cs.
Recovery:
After thrust ends, the rocket flutters down.
Flight Rating: 4 out of 5
Summary:
I like the Helix series. This one has yet to get a proper outing but proved easy to build and is expected to perform
likes its 13mm siblings.
Overall Rating: 5 out of 5
Other Reviews
- Art Applewhite Rockets Helix (18mm) By Matt Gillard (March 8, 2009)
Brief: The 18mm Helix is a monocopter from Art Applewhite's new range. I got the kit as part of a set of six rockets Art sent me for placing in EMRR's youth participation contest. I gave 4 of the rockets to members in my club, keeping this one for myself, as I'm really liked the Popsicle stick monocopter that Art gave the plans for on TRF. Construction: The kit comes in a ...
- Art Applewhite Rockets Helix (18mm) By Dick Stafford (June 14, 2008)
Brief: This is an extremely simple monocopter design that uses a section of 29mm motor tubing as the central hub. Construction: The parts list: 3/16" Basswood sheet 29mm tube BT-20 motor mount ¼" dowel ¼" launch lug This kit requires Elmer's Glue All, and an X-Acto knife with a new #11 blade. It's almost so easy that it ...
 |
 |
Flights
 |
 |