Madcow Rocketry Hawk MIM-23B
Madcow Rocketry - Hawk MIM-23B {Kit} (K-116)
Contributed by Patrick Bissonnette
| Construction Rating: | starstarstarstar_borderstar_border |
| Flight Rating: | starstarstarstarstar_border |
| Overall Rating: | starstarstarstarstar_border |
| Diameter: | 2.60 inches |
| Manufacturer: | Madcow Rocketry  |
| Style: | Scale |

Brief:
The U.S. Army MIM-23B Hawk is another beautiful model from Madcow Rocketry. It can be purchased in either 29mm or
38mm motors options. My brother chose the 29mm because those motors would fit his budget better.
This review was followed by me as my brother built most of it.
Construction:
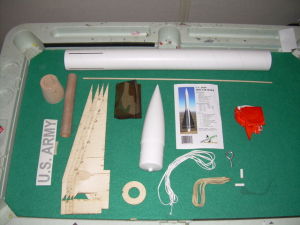
The kit includes:
- 1 Plastic cone with eye bolt
- 1 Balsa tail cone
- 1 Pre-slotted 2.6in body tube
- 1 29mm motor tube
- 1 Centering ring
- 4 Laser cut fins
- 1 Kevlar® shock cord section
- 1 Nylon shock cord section
- 1 Nomex® heat shield
- 1 24in chute
- 2 1/4in launch lugs
- 1 Set of vinyl decals
- 1 1/8in spruce tip stock

The components in this kit are all top notch. The Nomex® heat shield and Kevlar® cord are nice additions.
My brother built 90% of the kit. I followed along as he built it so I could help out and get this review written. Although this was his first MPR kit to build there was no trouble. I can't say the instructions are all that great. It could use some extra illustrations for the beginner, but we really didn't use them anyway.
Elmer's Wood Glue, 5min epoxy, and a little JB Weld was used throughout the rocket.
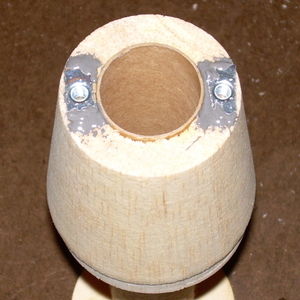
 Everything was pretty much built stock. The only big thing we added was motor retention.
Madcow expects you to friction fit the motors. That's fine for SU motors, but I'm not going to risk reload casings that
way. I added 2 T-nuts to the bottom of the tail cone. I plan on using small washers to hold the motor in.
Finishing:
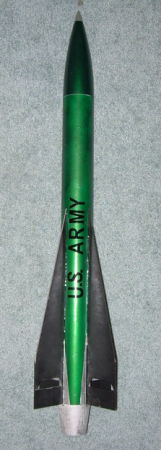
My brother decided to deviate from the scale paint job and attempt something a bit more challenging. Rather than
masking the rocket, he painted the body tube before the fins were on. This was a bad idea because I had to sand away
some of the paint before attaching the fins and it messed the paint job up a bit. Paints used were Testors Jade Green
Metal Flake, Testors Chrome, and Model Masters Metallic Black.
Construction Rating: 3 out of 5

Flight and Recovery:
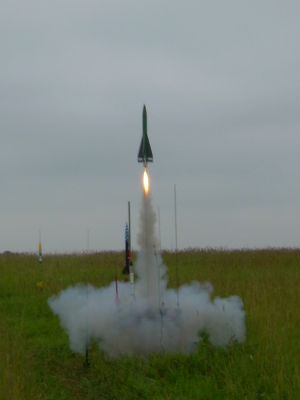
We finally flew it. We were planning on getting 2 flights, but only got 1. The first flight was on an F40-7
(recommended motor) The boost was great. Unfortunately the delay was way too long and the deployment zippered it about
7in. It is repairable and we plan one flying it on a G next.
Flight Rating: 4 out of 5
Summary:
It is sturdy and should be able to take up through a mid H motor. I would recommend this rocket to anyone looking for
a new mid power rocket. The instructions could use some work for a beginner and I think adding motor retention would be
a nice touch too.
Overall Rating: 4 out of 5
Other Reviews
- Madcow Rocketry Hawk MIM-23B By Mike McFadden (April 20, 2008)
Picture courtesy of Madcow Rocketry Brief: Modified for dual deploy. 24" Drogue and a 36" main. A 38mm and 1/4" plywood fins were also added. Construction: 15.5" and 10.5" body tubes, 4 1/4" plywood fins, 1 1/8" centering ring, 1 balsa tail cone, plastic nose cone, 36" chute, chute protector, Kevlar ® ...
 |
 |
Flights
 |
 |
 |
 |
V.P.I. (April 13, 2010)