Thrustline Aerospace Smoke and Fire
Thrustline Aerospace - Smoke and Fire {Kit}
Contributed by Joe Policy
| Construction Rating: | starstarstarstarstar_border |
| Flight Rating: | starstarstarstar_borderstar_border |
| Overall Rating: | starstarstarstar_borderstar_border |
| Manufacturer: | Thrustline Aerospace |
I picked up the Smoke and Fire kit when I bought the A-SLAM from Thrustline Aerospace via eBay (Not thrilled with that, but did it anyway). Many of Thrustline's kits draw me to them and this one was no different. I loved the fact that it was a larger rocket with 3x24mm cluster configuration and the many fins and transition.
 The kit's price starts at $34.75 (starting bid on eBay). Interestingly, Thrustline doesn't use the "buy it now" feature (presently). For this price, there is a lot of rocket. How can I say that? I compare it to the price of an Estes Executioner E for about street price of $31.
Like a number of Thrustline's kits, it is based off of the 1.64" x 5.5" solid balsa nose cone (PNC-60MS). This attaches to a 14" payload tube. This then uses a solid balsa transition to a 12" piece of BT80 (2.6") tubing. There is plenty of 1/8" Balsa stock for the many fins. The kit also includes two laser-cut 1/8" plywood centering rings, three 24mm motor tubes, thrust rings, and retaining clips. Two 18" Mylar parachutes, Kevlar and Elastic shock cords, swivels, and eye-screws. Thrustline provides both 1/8" and 3/16" launch lugs. And lastly a bag of BB's for nose weight, .80 ounces worth.
CONSTRUCTION:
The instructions are printed on a 7 pages of 8½ x 11" paper (single sided). There are black & white photos throughout to assist in the assembly of the kit. There are fin templates and tube marking guides made from standard printer paper. There are also Mylar parachute assembly instructions. The kit would probably be considered a skill level 3 or 4 with all the various parts and activity.
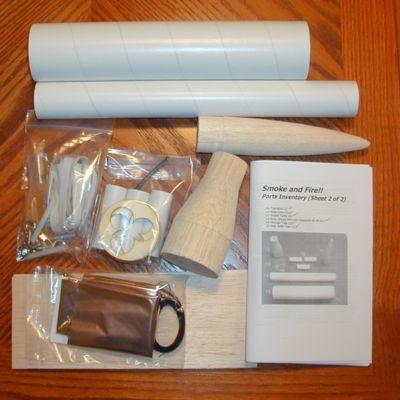 There are many parts and building steps to this kit, but let me highlight the main events:
The cluster motor mount is assembled first. Interestingly, the use of the provided motor hooks is optional. Step one points out that if you'd rather friction-fit your motors then to skip "...all the steps that pertain to the engine clips". I wanted to use them, so that meant that I need to cut the notches in the lower centering ring. The instructions say to use a sharp hobby knife, but I hit it with a Dremel tool.
The motor hooks are then added to the 24mm motor tubes and taped in place. They are then mounted into the two centering rings. Only a light sanding was needed on the 1/8" plywood centering to make everything fit.
Once dried, the builder needs to add a 1/16" hole to the top centering ring. This allows the 26" Kevlar® shock tether to be tied around the three motor tubes.
The body tubes are marked next using paper tube marking guides. No issues.
I'm not terribly happy with the 2.6" tube. It is Estes-like thin tubing. I find it to be the weakest component and would like to see a thicker (LOC or AT-like) 2.6" tubing. Probably would need to add more nose weight if it was converted.
Thrustline responded to this comment this way: "As for the BT80 tube, I've never had any problem with it. It's the same tube used in the Mike IX which I've had a lot of success with. As far as it being weak, I have not found that to be the case. The motor mount gives excellent rigidity to it."
I would agree that the motor mount gives the bottom portion rigidity, but I found the upper opening as the weak point. Just an observation I made while handling the kit. Not that big of deal.
The fins are then cut out using paper fin templates. Boy oh boy, I rather have card stock, especially for those thin strakes.
Eye-screws and a piece of 1/4" elastic is provided so that the nose cone can be attached without being glued in place. I didn't do this and chose to glue my nose cone into the payload section (which technically could no longer be called a payload section since it is no longer accessible).
The upper tube is glued to the upper part of the balsa transition. Then the five (5) small strakes are added.
The nose cone is prepared for nose weight by drilling four 3/16" holes and using epoxy to set the BB's in place. The center of the nose cone is where an eye-screw would go if you were making it removable for the payload section.
Both the 1/8" and 3/16" launch lugs are glued in place. Why two sizes? Thrustline says, "In the photo you'll notice I used 2 sizes stacked against each other at 2 and 8 inches from the end of the body tube. This allows me some flexibility when choosing launch rods at club launches. I have included 2 sizes (2 each) so that if you prefer, you can use a similar method."
Finally, the 42" long piece of 3/8" flat shock cord is tied to the Kevlar shock tether and then the 18" parachute is added. The second 3/8" flat elastic is attached to the large end of the transition and then its 18" parachute is attached.
Finishing... yes, finishing. Get your fillers, sand paper, and patience all together. There is a lot of balsa exposed here. Lots of grains to fill. Lots of joints to sand. Lots of work!
I used my typical multiple coats of Plastic-Kote Primer and sanding in-between. Having to fill and finish the nose cone, the transition, and 10 fins took a lot of time and coats of Plasti-Kote Filler Primer. The transition is hardest due to the grain exposure AND because the upper fins are half glued to the transition! I then used Walmart White and Black paint (additional comments about Walmart paint). I painted mine with some funky patterns. Got a bit carried away with the masking. I was going for a NASA look. Eh, it has grown on me.
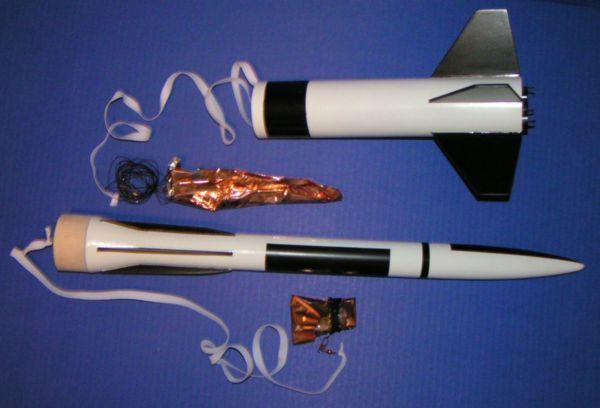
Overall, for CONSTRUCTION I would rate this kit 4 points. The instructions are very good with the photos. There are a number of building options that the builder needs to decide on: hooks, payload nose cone, and launch lug size. The parts quality was good with plenty of balsa to cut out the five lower and five upper fins. There is a balsa (BT60) nose cone and a balsa transition. There is Kevlar to Elastic shock cords and mylar parachutes. There are no decals.
 FLIGHT/RECOVERY:
Didn't find any motor recommendations in Thrustline's instructions, however these are what are listed on the eBay page: 3x - C6-5s, C11-5s, D12-5s.
Thrustline indicates the finished rocket should weigh about 8.6 ounces. My finished rocket weighed 8.1 ounces.
I flew mine on the 3/16" lug/rod. I'm not sure I'd like the variability that would surely come from flying it on a 1/8" rod (whip).
First flight was on three C11-3s. They were the motors I had and I figured the early ejection would not be a big problem, especially with the two-piece recovery method. I should have waited for some C11-5's. I had a very early ejection, but that was not the worse of it. Apparently the bulk of wadding I added was not enough. It was 6-8 squares. So the lower recovery section was badly burned, including the lower 'chute. The upper section ejected well and descended fine. The lift-off was fast. I mean really fast!
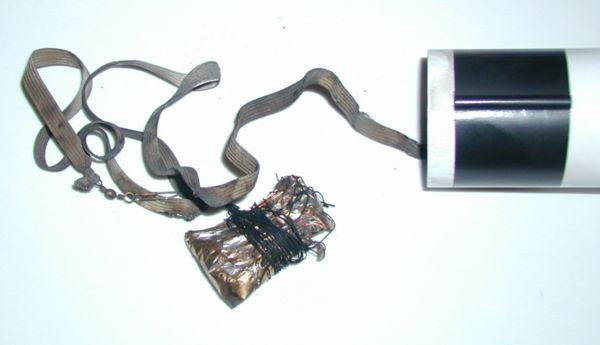
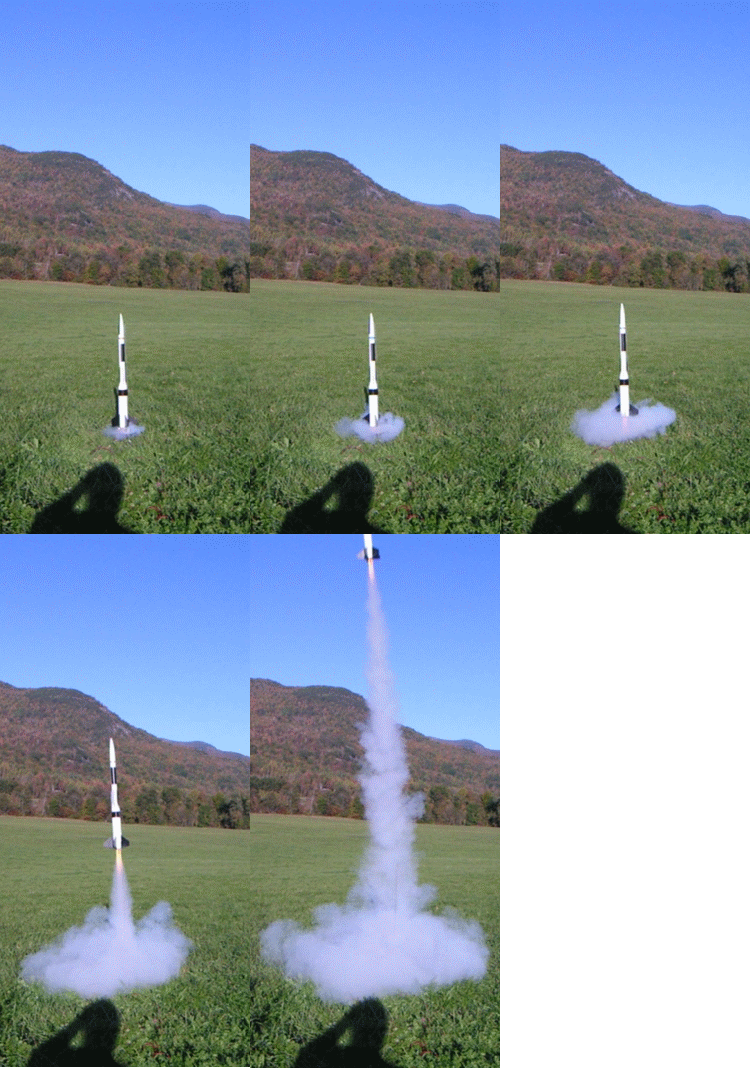 I repaired the lower 'chute and shock cord and added a Nomex heat shield. I then cleaned out my three C11's and drilled a larger hole in the clay nozzle. I inverted them and had instant 24mm-to-18mm adaptors.
I then loaded it up with three Est SU C6-5's. Excellent flight up, straight and stable. Ejection was past apogee. At ejection the lower section 'chute never opened due to a tangle.
I loaded it up again with three Est SU C6-3's. Another slow and graceful lift-off. Slower than the C11's, of course. At ejection the upper and lower sections got tangled and it came down on only the lower 'chute. No damage, though.
Determined to have success, I loaded it up again with three Est SU C6-3's. This time after repeating a great lift-off, I had a fully successful parachute deployment. Bravo!
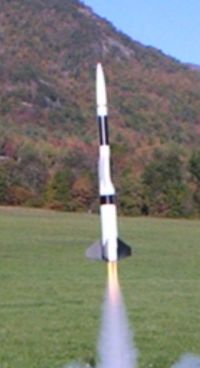
For FLIGHT/RECOVERY, I would rate this rocket 3 ½ points. The Smoke and Fire looks great lifting-off on three C6's. Can't beat that slow, majestic look. It is a stable rocket as well. The complications that come from a 2.6" body tube and a two piece deployment showed itself with my flights. All of these can be addressed with practice, so that, in itself, makes this a fun rocket for flying.
I give the rocket an OVERALL rating of 3 ½ points. I need to say... DON'T BUY THIS KIT if you are looking for an easy to build and easy to finish rocket! However, if you are looking for a moderately challenging build and a highly challenging finish (unless you don't care about balsa grains and paint it all one color!) then this kit could be one of your choices.
On the other hand, once finished, this one can give you some nice flights. They can be more expensive since you are using up three motors a time... but hey, how else will you enjoy clusters?
Other Reviews
- Thrustline Aerospace Smoke and Fire By Joe Policy
Brief: A big 3 motor cluster with a payload section. Its 5 lower/5 upper fin design helps this beast to stand out at a launch. It is rated at level 2/3. Construction: The parts list: 1 Fin Stock 1/8" Balsa 2 1/8" Launch Lugs 2 3/16" Launch Lugs 2 Swivels 2 Small Eyelets 1 Large Eyelet 3 Engine Hooks 3 Engine Blocks 2 Centering Rings 1 ...
 |
 |
Flights
 |
 |