| Manufacturer: | Estes  |
Brief:
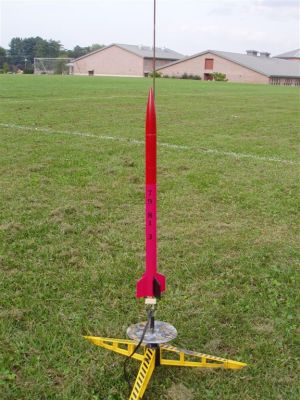
I used the parts in an Estes DC Gemini to create a sport scale Javelin III. The
design was based on data from Peter Alway's book, Scale Bash. The DC
Gemini really has a lot more potential than what I did with it. I decided to do
something simpler instead. The real Javelin III was built by Space Data
Corporation and was tested in 1965. It was used to study chemical releases in
the upper atmosphere and to carry scientific payloads.
Modifications:
First I cut the main body tube into three sections. I did this to create a faux
payload section, resembling the design in Scale Bash. One end of the
Gemini DC body tube has slots and holes, so I worked my way backwards opposite
that end. The tube cut for the bottom is 10.8". The middle segment is
1.5", and the end segment is 2.9". One of the segments had two of the
holes showing but were covered from the inside with the tube couplers I made. I
made two one-inch couplers from the remaining piece of tube. These had slots,
but it was ok, because I had to cut them down the middle and trim make them fit
as couplers anyway. I used yellow glue to glue all the segments together and
rolled on a flat surface to make sure they were straight. I assembled the motor
mount per the instructions and recessed the motor tube 3/8" from the
bottom. I used my Dremel tool to cut off some of the motor clip so it wouldn't
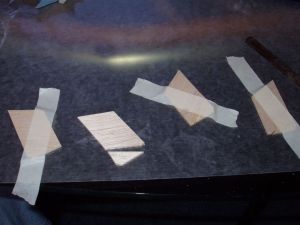
stick out from the tube. The fins had to be cut in two pieces from the fin
stock and glued together before attaching to the rocket. I modeled these in
RockSim and printed the templates, but they are also included in Scale
Bash. I could have cut them singly from the existing fins, but the grain
would have been in the wrong direction. I glued the fin pieces together with
yellow glue. When they all were dry I put them together and sanded the edges
evenly. I sanded a 1/8" bevel on the leading edges per the Scale
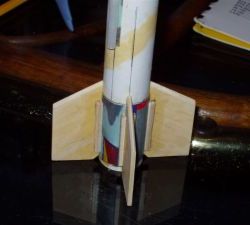
Bash specification. The original DC Gemini design uses slots for the fins,
which I didn't have anymore, so I had to make a wrapper guide. I used VCP to
produce this. The bottom of the fins are aligned with the bottom of the body
tube. After the fins were on, I cut strips from the card insert to simulate the
fin can (another Scale Bash specification). These turned out to be about
23/32" x 3/4". These were attached 5/32" from the bottom of the
tube. I then cut 8 balsa strips from the remaining balsa. The balsa is already
3/32" thick, so I cut a 3/32" strip along the longest piece. I was
able to get all 8 segments out of the one strip. The strips need to be about
5/16" long. They should be glued at fin joints 5/16" from the bottom
of the body tube.
Fin Alignment Guide
Fin Position
Wrapper
Fin Template
Construction:
Parts that were used from the kit:
- 1 24mm x 15.2" body tube
- 1 4:1 ogive nosecone
- 3/32" balsa
- 1 1/8" elastic shock cord
- 1 BT-20 to BT-50 motor mount assembly
- 1 1/8" launch lug
- 1 12" parachute
- 2 1" couplers (made from remaining end of body tube)
- 4 1 23/32" x 3/4" rectangles cut from the kit's card insert
- 8 1 5/16" x 3/32" 3/32" balsa strips cut from scrap fin balsa
- 1 trifold shock cord mount
Finishing:
I pre-finished the tubes and fins with two coats of Elmer's Fill n' Finish.
After the rocket was built, I painted the bottom part florescent red and the
upper section banner red. I painted one fin black and added my NAR number down
one side of the lower segment. I used a coat of clear coat finish after adding
everything else was done.
Flight:
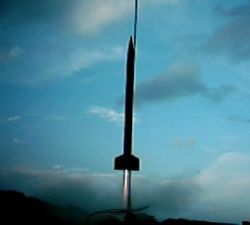
As of now, I've flown the rocket three times, on 2 A8-3s and 1 B6-4. All
flights were perfect with straight boosts and parachute deploying at apogee. I
didn't have an altimeter on board, but RockSim predicted 186 feet on the A8 and
514 feet on the B6. I used one of the 12" chutes that came with the kit
and cellulose insulation for the recovery wadding.
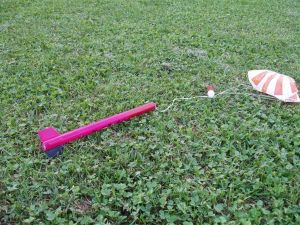
Recovery:
The size chute seemed right for the rocket. After three flights, the shock cord
looks a little worn, but it should be OK for a while.
Summary:
This was a fun rocket to build and it flies great. Scale Bash was a good
resource for this design. I was able to easily identify my options based on the
type of nose cone and length body tube that came with the kit.
 |
 |
Flights
 |
 |