| Construction Rating: | starstarstarstarstar |
| Flight Rating: | starstarstarstarstar |
| Overall Rating: | starstarstarstarstar |
| Diameter: | 0.76 inches |
| Length: | 12.70 inches |
| Manufacturer: | Semroc  |
| Skill Level: | 1 |
| Style: | Sport |

Brief:
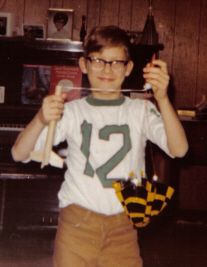
The single-stage 4FNC Centuri Javelin was my very first model rocket, as seen
in this photo of myself from the early 1970's. Estes model rockets were only
available by mail order in South-Central Idaho back then, but I could easily
buy Centuri model rockets at a drug store in my home town of Jerome and a hobby
shop in nearby Twin Falls.
 After coming back
to model rocketry in 2000 and learning the Estes part numbering system, I began
fervently wishing that someone would begin manufacturing Centuri-size
parts. With the "second coming" of Carl McLawhorn's Semroc
Astronautics Corporation in 2003, my prayers were answered. Additionally, Carl
released his "Retro-Repro" version of the Centuri Javelin, which I
bought with my first order from Semroc.
Construction:
The kit includes:
- Body Tube ST-790
- Balsa Nose Cone BC-735
- Laser Cut Fins FV-16
- Thrust Ring TR-7
- Launch Lug LL-122
- Screw Eye SE-10
- Elastic Cord EC-118
- Kevlar® Thread SCK-24
- Plastic Parachute RC-12
- Tape Discs TD-6
- Shroud Line SLT-6
- Decal DKV-16
- Empty Casing MC-727
- Snap swivel (not included)
Following a hint in Bill Eichelberger's review of Semroc's Astro-1, I prepared the body tube by spraying it with 2 coats of Krylon white primer, and gently sanding the tube with 320/400 grit sandpaper after each coat had dried for 24 hours.
I sanded the balsa nose cone shoulder to fit the body tube, and then the rest of nose cone until its finish was smooth. I sanded the balsa fins per the instructions, except I didn't round the fin edges. I dipped the fins and nose cone in Minwax Wood Hardener, as suggested by Stefan E. Jones. (NOTE: Excellent ventilation is needed for this step! Do it outside away from open windows, so the harmful vapors don't drift into your house.) The wood swelled slightly, so a light sanding was needed to restore the fit of the nose cone.
The fins and nose cone were then finished with wood filler, and sanded smooth with 320 grit sandpaper. The nose cone was fine sanded with 400 grit sandpaper. The Minwax Wood Hardener definitely beefed up the balsa nose cone, and cut down on the amount of wood filler needed.
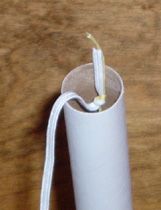
 I trimmed the
24" Kevlar®
thread to 10" long to avoid a potential body tube "zipper".
Perhaps the 18" elastic cord should have been 24" long instead, but
hopefully it'll be long enough to avoid the infamous "Estes dent."
 I installed the fins on this Semroc recreation of a Centuri rocket using
wood glue and an "old school" Estes fin alignment guide. While
"rebuilding my first rocket," I discovered you don't want excess wood
glue leaking out from under the fin/body tube joint, because that causes
unsightly glue excess, which means you don't have a clean, crisp line when it
comes time to mask off the fins. But using wood glue results in a very solid
rocket.
I also added a snap swivel to the 1-mil polyethylene parachute.
Finishing:
I spray painted the nose cone with Krylon gloss black separately, then I
painted the body tube and fin assembly Krylon gloss white. With 2 coats of
primer already applied to the body tube, I discovered I needed to apply very
light mist coats, or the paint tended to run quite easily. I masked the fins
(my first try at this technique, in both incarnations as a rocketeer), painting
2 opposing fins Krylon gloss red, and the other 2 fins gloss black.
Oddly enough, the decal paper didn't seem to soak up the water to release the decal easily. As a result, you can see the "Javelin" name is a bit crooked. I used Premium Decor Clear Acrylic (suggested by Tom Prestia of Tango Papa for his decals) for the clearcoat finish and the decals didn't crackle.
Construction Rating: 5 out of 5

Flight:
Usually I insist on installing engine locks, but since they're decidedly ugly
on minimum-diameter rockets, I settled for snugly friction fitting the engine
with tape. In honor of my original Javelin, I substituted a yellow and black
12" Semroc parachute for the red and white 'chute included with the kit.
Since this rocket is so light, I wanted to increase my chances of getting it
back, so I cut out the Semroc logo for a spill hole.
I packed my wife and two daughters into the car for a family rocketry outing at the Tripoli Idaho's summer flight range near Fairfield, Idaho, about 70 miles away from my adopted hometown of Twin Falls. Winds were light, and the range proved to be an alfalfa field which went on for acres. In other words, not traditional lawn grass, but still a fairly soft landing place for rockets.
I popped in an A8-5 with 2 and a half turns of masking tape to friction-fit the motor, used about 5 toilet paper-sized squares of Estes wadding, and packed the chute. The Javelin tore off the launch pad like its namesake, arrowing up straight and true to Rocksim's estimated height of 500 feet. The ejection charge fired after apogee, and after about a quarter mile walk for recovery, I discovered the rocket had spit the motor.
The second flight on another A8-5 was very similar, evoking several comments like, "Good job, Jay!" The elastic shock cord length was fine, without any infamous "Estes dents" occurring.
Come flight number three, I was in a bit of a hurry, and so I prepped the final engine I had in a package, fairly certain it was my last A8-5. I noticed the last number was a "5," anyway. Out to the pad, and then the Launch Control Officer (LCO) counted down and pressed the launch button. The Javelin ripped off the pad, and I told my wife, "It's not supposed to do that." The ejection charge fired after apogee, and the 12" parachute looked about the size of a pinhead. Just then, my 6-year-old daughter suddenly had some sort of crisis that we had to deal with immediately, and when I finally began scanning the skies...my Javelin was nowhere in sight.
A half-mile trek into the alfalfa turned up no rocket. Not only was this a recreation of my very first model rocket, it was also the first rocket I've lost as a BAR. After checking my field box, I found a lone A8-5 motor, but the sole C6-5 I had was missing, which explains why flight number 3 reached an altitude of about 1500 feet.
And that my friends, is why if you have a nicely painted rocket, it's important to take lots of pictures before you launch it.

Recovery:
PROs: Semroc uses now-standard Kevlar®
cord tied to thrust ring, with 1/8" elastic shock cord. ("Mmm,
beefy!") A very light rocket that could still perform very well with 13mm
"mini" engine mount adaptor.
CONs: Kevlar® cord a little too long, so it needs to be shortened to avoid "zippering" the body tube. Friction fit can be less reliable than engine lock, so motor often kicks out at ejection, causing rocket to drift further.
Flight Rating: 5 out of 5
Summary:
PROs: A high-quality 21st century recreation (at least in my mind) of a classic
Centuri rocket. Great materials and a fantastic Centuri checkerboard-style
chute, too!
CONs: Kevlar® cord length. Decal paper is too "beefy" to absorb water readily.
I'd give this rocket 5 and a half points, just out of sheer enthusiasm...except for the decal difficulty. A very solid 5 nonetheless and building this kit has made me an incurable Semroc fan. Next time, I'll order at least 2 Javelins!
Overall Rating: 5 out of 5
Other Reviews
- Semroc Javelin By Chan Stevens
The Semroc Javelin is an 18mm minimum diameter kit based on a 1965 Centuri design that is easy to build and flies great. The kit includes: ST-790 body tube Balsa nose cone 4 Balsa laser-cut fins Thrust ring 12" plastic chute Kevlar/elastic shock cord combo Waterslide decals The instructions were well written and easy to follow. This would probably rate about a ...
 |
 |
Flights
 |
 |
J.G. (October 22, 2004)
B.B. (May 25, 2005)
 |
 |
S.E.J. (August 2, 2004)