Brief:
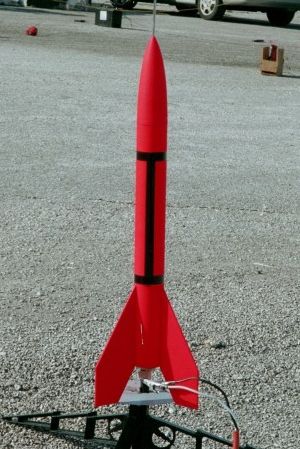
The Super Mark is one of about nearly a half dozen kits Hawks Hobby has put on the market that are upscale versions of very popular Estes classic OOP from years ago. Hawks Hobby is located in Crosby, TX which is basically a suburban area just outside of Houston. I'm very impressed by the fantastic line up of the current kits Mark and Loretta Hawkins, owners of Hawks Hobby, that I had to make the Super Mark my first purchase. Since the Estes Astron Mark was one of my first model rocket back in 1969 when I got started in this great hobby, I knew owning the Super Mark would bring back wonderful memories and add to my always growing fleet.
The Super Mark is a skill level one beginner kit, single (24 mm) stage that is designed to be recovered via 16" nylon parachute that Loretta herself makes for their kits. In addition to the specs mentioned at the beginning of this review, the Super Mark's fin span is 6.5 inches.
After sending my money order via snail mail to Hawks Hobby, my kit arrived within a week in great condition--maybe living in the same area helps! One other thing that struck me about this mail order is that in addition to the kit, I received a nice Hawks Hobby ink pen with a business card size ID that gives interesting info on the kit ordered. In addition to listing the kit's specifications, this card shows that my model is production # 0014. Saving these tag cards could become collectors items years from now.
Finally, near the back of the instructions, Hawks Hobby has a 100% satisfaction guarantee promise. I've already seen first hand the seriousness Mark and Loretta Hawkins take this guarantee.
Construction:
The parts list are as follows:
- 1 Nose Cone (Balsa)
- 1 Body Tube
- 1 Centering Ring Set (looks like thin but sturdy plywood)
- 1 Fin Set (Balsa, with three precision cut fins)
- 1 Engine Mount (EM-9-150)
- 1 Launch Lug (LL-320)
- 1 Screw Eye (ES-1-38)
- 1 Kevlar Shock Cord Anchor (KC-36)
- 1 Shock Cord (SC-36-38)
- 1 Decal (D-040)
- 1 Parachute (P-16-4-48)
- 1 Instructions (IN-040)
- 1 Black Monokote (BM-040-17)
- 1 Coupler (HTC-16)
In addition to the parts listed, you'll find a 24mm size coupler in the bag. I had a heck of a time trying to figure out what it was for. An email to Loretta cleared the confusion--this coupler is a spacer for use inside the engine mount when using the C11 and D12 motors. I felt like a real dummy on learning this!
As with any model rocket kit you decide to build, read through the instructions fully before beginning construction. Additional items needed for building this model are: Fine sandpaper, a pencil, weight for balancing, clear tape, screw for weight if using washers or other such item if needed, wood or white glue, CA, sanding sealer, paint, and, of course, engines, wadding, and launch system.
The instructions are pretty easy to follow, however, I made several slight deviations. Before I glued the third fin in place to the body tube, I used that fin's leading/root edge as a "pattern" for cutting the angle to the launch lug, so the angle will be uniform. Then I glued the third fin in place followed by the launch lug once all the joints have completely dried.
Finishing:
Since this model has plenty of balsa surfaces that needed some work, I used fine sand paper and sanding sealer to fill in the grains and make the surfaces smooth. How much work you put into it will determine the quality of finish.
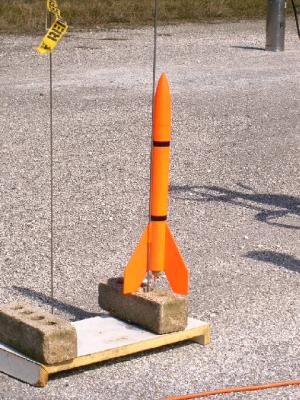
The Super Mark is suppose to be painted a gloss orange from nose to tail, but since I felt this model will be a high performance kit for the motors it's designed to use (anyone remember the performance of Estes' original Astron Mark?), I painted my Super Mark florescent orange to aid tracking and visibility. Using this concept came in handy on my model's first (and to date only) flight.
The black stripe Monokote adhesive when applied properly really gives the Super Mark a sharp, classy look. A really well done, designed up scale kit by Hawks Hobby that any rocketeer would be proud to have in his/her fleet!
Construction Rating: 5 out of 5
Flight:
The recommended motors are C11-5, D12-7, and E9-6 (but, in the second tag card it lists the E9-8). Furthermore, I believe this model, when using a 2050 type interchangeable motor mount, can also use 18 mm engines such as the C6-3 (and maybe a C6-5 if the model isn't too heavy after painting).
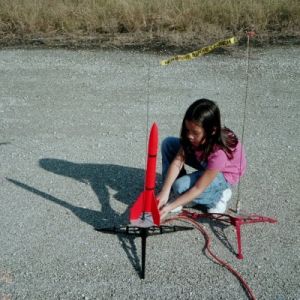
For the first flight, I decided to use the D12-5 since I was concerned that the seven second delay in the other choice for the D12 would give the Super Mark added nose down speed after reaching apogee. This first test flight took place at the NASA/Houston Rocket Club (#365) club launch at JSC on December 16, 2006. I also decided against using the kit provided nylon parachute and used instead a smaller plastic parachute due to the rather windy conditions we had (proved to be a blessing, as we will see!).
Prep is very easy and straightforward as in any standard model rocket. Using the 24mm coupler as a spacer, the D12-5 fits very snugly with the engine clip retaining the end of the D12's casing firmly. Use enough flame proof wadding (I used the standard Estes tissue wadding) so that you have a good seal between the engine mount and recovery system, but not too tight. The size of this model makes it very easy to install the recovery system without difficulty.
Due to a miscommunication, my Super Mark was launched before the countdown got under way (so, we missed the first part of the boost phase as well as didn't get any pics of the launch itself). I can say my model flew very well as could be expected for a solid, D12 powered flight. Even with the 10-14 mph winds we had, the Super Mark flew straight and very high.
Recovery:
The Super Mark kit uses the Kevlar/Elastic Shock Cord combination for the recovery system. This should help make the internal attachment of the Kevlar to the forward plywood centering ring permanent.
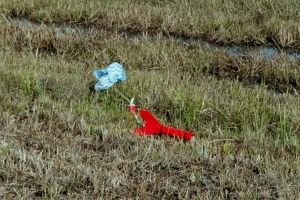
On this first test flight, the ejection occurred right after reaching apogee. However, due to either the stronger wind (or my parachute folding technique may not have been the best), it became obvious during the descent that several shroud lines had torn loose from the parachute. Even with this "handicap," my Super Mark still landed a considerable distance from the launch site, which required me to walk through the JSC fields that was quite saturated with standing water at many places (thus, both of my feet got soaked!). Imagine what would have happened had I used the kit provided 16 inch ripstop nylon parachute! Since Mark and Loretta Hawkins arrived at the launch site shortly after this flight, I did talk to Mark about the possibility that the Super Mark may need to be recovered via some streamer due to its high performance to save from long chases. I would venture to say that maybe some highly visible mylar streamer material should be sufficient for this reason. Otherwise, use of the nylon parachute should be ok on calm days and/or at very large fields.
Flight Rating: 4 out of 5
Summary:
The Super Mark should be a great sport flyer and demo rocket. The next time I attempt to launch it, I will use a 2050 motor adapter and see what a C6 will do.
This is a very well designed kit with excellent quality parts that makes it a very durable, sturdy model. Having seen what it can do with a D12, I think that's the maximum I'd rather use.
I'm excited about this kit and the others Hawks Hobby carries. Mark and Loretta are great people to know and do business with. I encourage you to give them a try. It's obvious, from what I know from first hand experience, that Mark and Loretta stands behind what they sell. That's the secret to putting your customers first.
Overall Rating: 5 out of 5


D.W.M. (February 19, 2007)