Dr. Zooch Titan IIIC SLV5
Dr. Zooch - Titan IIIC {Kit} (Titan IIIC SLV5)
Contributed by Hans "Chris" Michielssen
| Construction Rating: | starstarstarstarstar_border |
| Flight Rating: | starstarstarstarstar |
| Overall Rating: | starstarstarstarstar |
| Published: | 2010-04-15 |
| Length: | 14.00 inches |
| Manufacturer: | Dr. Zooch  |
| Skill Level: | 3 |
| Style: | Scale |
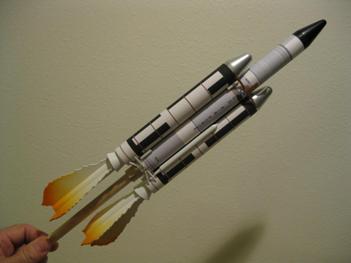
Brief:
An "Ant Scale" version of the Titan IIIC SLV5.
Construction:
Opening The Box:
There are a lot of centering rings. Six CR2050P rings and four CR205P rings.
The two TVC Tanks are interesting. There is a slight difference in ends of the two lathed dowels, an easy fix.
The longer Core Nose Cone is pre-weighted. The ribbon-like Kevlar® is used in this kit.
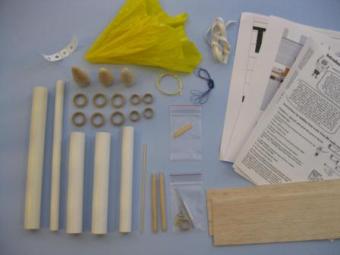 The
instructions and Wrap Sheets were rolled. I ironed them flat and scanned the Wrap Sheets just to be sure.
Three main tubes are all based on the BT-50 format.
I found the instructions very easy to follow and entertaining.
There were no real "gotchas"
While the DR. Zooch kits have you apply White Glue to just the outside edges of a body wrap, I have better luck using Spray Adhesive. I feel it gives me a little more time to make adjustments, I never seem to get it right the first time.
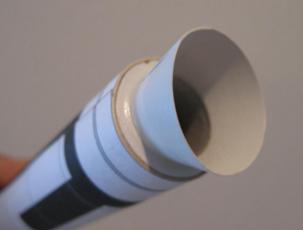 The
Core Stage Body Wrap is fairly long. I decided to cut it into three pieces to make the wrapping easier. I’ll spray
adhesive to the top third and wrap it using the top of the tube as a guide. The middle wrap will butt-up against the
bottom of the top wrap. And, the same with the third.
You are directed to cut thin bands from the brown and gray colored rectangle on the wrap sheet. I have done this before on the Ares Stick kit. On the Titan kit though, these are about half that width, very thin.
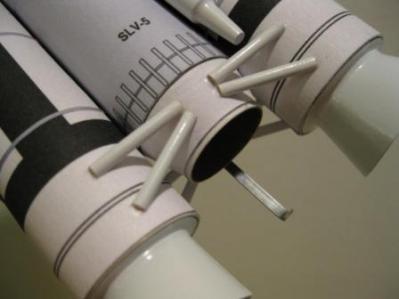
There are six "Flame Fins. Three fins on each BT-5 tube. All are arranged out of the way of the engine flame. There isn’t a marking guide for the Flame Fins. You are directed to glue them at “90 degrees apart.” I have marking guides, but supplying one with the kite would have made it more convenient.
 The
Shock Cord Mount is to be glued in place 2" from the top of the Core Tube. This seemed a little deep, but I glued
it there anyway.
I switched out for a larger Screw Eye. The supplied Eye was small and the screw threads were not deep. I was afraid it could pull out of the Nose Cone.
The Elastic Shock Cord is tied to the Kevlar®. I decided to tie on the Parachute one third the way down from the Nose Cone. This way the Nose Cone would have less chance of getting tangled up in the Parachute Shroud Lines.
Finishing:
After making Flame Fins on a few other Zooch kits, I have developed my own favorite color
combination. All is sprayed white. Then, yellow follows on the lower half of the fin unit, blending the yellow with the
white. A light mist of orange follows, lightly misting just the outside edges of the fins. I try to duplicate the flame
coloring from pictures of the Shuttle launches.
Construction Rating: 4 out of 5
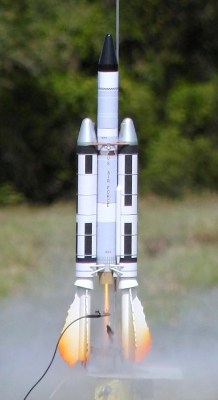 Flight:
I finally got around to flying The Titan IIIC at the R.O.C.K. monthly launch on April 3,
2010. There was plenty of wind and I was reluctant. I played it safe and went with a B6-4. I had no reason to be
worried. Even with wind gusts, the flight was straight up.
Recovery:
Recovery was fine, no damage. I'll go with a C6-5 next time around.
Flight Rating: 5 out of 5
Summary:
The Dr. Zooch kits are favorites of mine. Well engineered and great flyers.
Overall Rating: 5 out of 5
Other Reviews
- Dr. Zooch Titan IIIC SLV5 By Bill Eichelberger (April 14, 2009)
Brief: A semi-scale version of the first of the Titan IIIC launch vehicles, this Dr. Zooch version is constructed entirely of pre-printed paper and wood, and in the end, if you build with some patience and a tolerance for the slightly acerbic instructions, you will have a great performing, impressive looking bird. (Well, I did, and if I can do it it's well within the realm of anyone ...
- Dr. Zooch Titan IIIC SLV5 By Paul Morris (May 5, 2008)
Brief: This is my first Dr Zooch kit, chosen specifically for the 2008 EMRR Challenge. The instructions state that it is a light weight, high flier that is fun to build as it is to chase. Construction and Finishing: The kit comes in a very sturdy white cardboard box. All parts were present and correct with no damage. My first impression was how well produced the parts were. ...
 |
 |
Flights
 |
 |