| Construction Rating: | starstarstarstarstar |
| Flight Rating: | starstarstarstarstar |
| Overall Rating: | starstarstarstarstar |
| Manufacturer: | Polecat Aerospace  |

Brief:
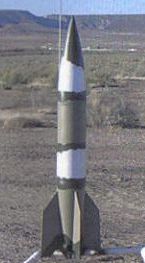
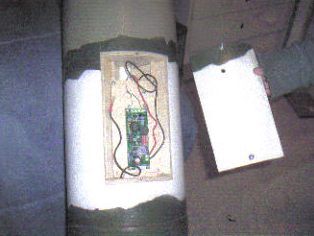
This V2 kit is a single deployment, parachute recovery kit with a 54mm mount. The rocket has a built in electronics bay accessed by a side hatch.
Construction:
The kit came with everything you need to complete except epoxy and a chute. It includes a 7.5" diameter body tube already glassed, a very nice fiber glass nose cone, slotted tail cone, four 1/4" plywood fins with beveled leading edge, fiberglass cloth for reinforcement of the fins, 3 plywood centering rings, 1 nosecone bulkhead for recovery system mounts, a 30" long 54mm motor tube, and a 7" long built-in plywood electronics compartment. The kit also includes mounting hardware for recovery system consisting of 2 U-bolts with washers and nuts and a tubular nylon strap. Rail buttons were a nice finishing touch.
The instructions were very clear and easy to follow along with great pictures of each step.
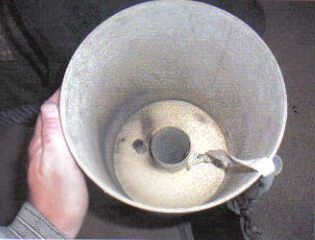
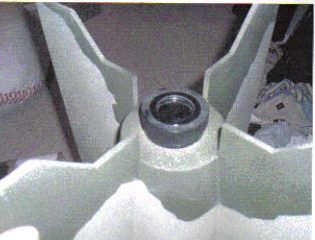
 The build was very easy other than the fiberglassing that is done in the interior of the tail cone. It is kind of hard to get to but the instructions walk you through how to make some simple tools to get the job done nicely. Mine turned out great other than some sticky hands. The kit is very large and you have to sort of wrestle the parts around when setting on the fins but it worked out great.If you have never built a big kit like this make sure you always think big when mixing up your epoxy, it takes plenty to get it right.In the end, everything aligned perfectly and seemed to be very strong.
Finishing:
As you probably already know the V2 really had no markings other than some interesting paint schemes and great lines. I decided to do mine with a version of the ragged camo as found on the V2 reference guide scale info from Rocketry Online (ROL). After sanding the entire rocket and filling some small imperfections, I was ready for paint. I first painted 2 large sections of the rocket white. Then with 2" masking tape I carefully tore the tape in half leaving 2 ragged edge pieces that were then used to mask out the other colors. I did this with 3 colors: Krylon white, camo olive, and camo tan. With the paint dry, the entire  rocket was wet sanded with 600 grit sandpaper before spraying it once more with satin clear coat to give it that flat, no shine look. (I have to confess I copied the 10" V2 photo on the Polecat website.) I finished it off with a 54mm Aero Pack retainer.
Construction Rating: 5 out of 5
Flight:
Talking to Andy at Polecat, he said the rocket can be flown on anything from a J to an M. I chose to fly mine for the first time on a Cesaroni Pro38 J285. I used the Aero Pack 54-38 adapter that is really cool and works great with the 54mm retainer.
I prepped the V2 with a new 85" Sphereachute I picked up at the factory and added a big piece of Kevlarchute protector.
 I used a Missile Works RRC2X 25K altimeter for one deployment charge at apogee and used motor deployment as a backup.
After making all the appropriate calls to set things up, we were off to the desert for a test flight of the V2.
We touched off on the motor and the V2 jumped to the sky like one of its smaller cousins only a little slower. Very straight, slow, loud, and awesome. The flight was perfect. I can't wait to try a K!
Recovery:
Deployment was perfect and the big 85" Sphereachute brought it home without a scratch. Impressive flight! The altimeter beeped out 1335 feet on a J285 with a 10.75 pound bird. Not bad, Cesaroni!
Flight Rating: 5 out of 5
Summary:
This kit was a lot of fun to build due to its big size. The part were all high quality and fit perfectly as intended. The rocket is very strong and impressive looking as it sits on the pad. As always though, the best part is letting it fly after you nervous finger touches the button and everything works perfect. You are rewarded for all the work and time spent.
Overall Rating: 5 out of 5
 |
 |