| Overall Rating: | starstarstarstarstar |
| Published: | 2011-10-08 |
| Length: | 12.50 inches |
| Manufacturer: | Odd'l Rockets  |
| Skill Level: | 2 |
| Style: | Helicopter |
Images Courtesy of Odd'l Rockets

Overview
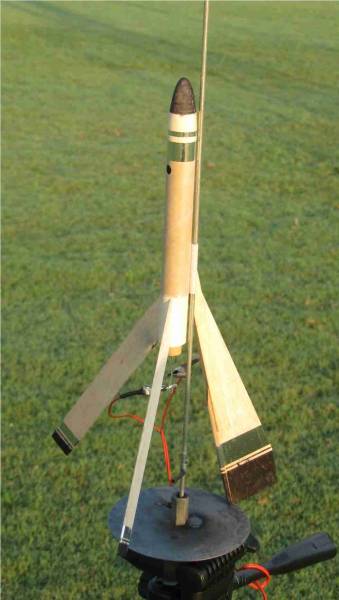
I saw the Cyclone demonstrated at a TTRA launch a few months ago and was really astounded by its performance. The Cyclone is a very small rocket that utilizes a novel combination of helicopter and breakaway recovery. The Cyclone has no parachute or shock cord; at ejection it separates into two halves with its two smaller fins attached to the lower half and the larger remaining fin attached to the upper half. The lower half spins back to earth fairly quickly but safely; the upper half spins to earth much more slowly, like a maple seed.
Packaging
I am used to conventional rockets with many parts and when I saw the Cyclone in its kit bag I was worried that the manufacturer had forgotten some parts because the kit was so small. The kit consists of 14 small parts and an instruction manual in a clear plastic bag. One big plus to me is that the bag is folded and stapled with a header card rather than sealed. I'm always nervous when having to cut open a sealed bag. The smallest parts are in a smaller, reusable zip-lock bag. Another plus. When opened and laid out the parts are easily discernible from each other. No confusion here. All the parts are of exceptional quality. All the balsa fin parts are on one laser-cut balsa fin stock. The balsa pieces came off the stock cleanly with minimal effort and only required minimal sanding.
Instructions
This kit has got to have the best printed instructions I have ever seen, and I should know, I work for a printing company.
On the front page is a full color picture of the finished rocket. Inside, the instructions are laid out in clear print (good for my aging eyes) and crisp illustrations. No bad surprises here. Heck, I can't even find any misspellings.
In the beginning it says, "These instructions are arranged in a logical order for easy assembly." Indeed! If you follow the instructions, you will find assembly to be very easy.
Assembly
Assembly was generally simple. For me, the only difficulty had to do with the centering rings. Notching the centering rings was tough, but that's because I don't have better tools for the job. Peeling the top layers of paper off two of the centering rings in order to make the coupler fit (as per the instructions) was daunting, but I've never done it before; they came out okay and the coupler fit perfectly.

Flight
As suggested in the instructions, I put off painting until I had tested the rocket.
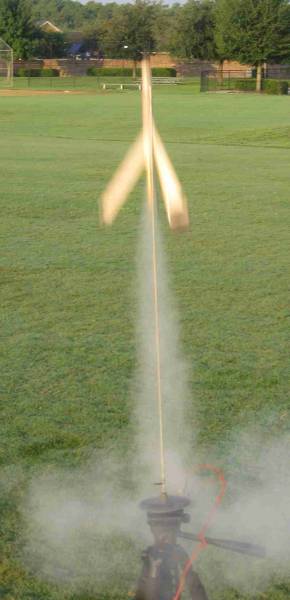
I took the Cyclone to a deserted park on a nearly windless day. The first two flights were on vintage Estes 1/2A3-2Ts and went off without a hitch. The rocket's ascent seemed to favor the large fin's side and required about five degrees compensation. That did the trick to get a good vertical ascent on the second flight. As advertised, the Cyclone does pleasantly whistle during ascent. For the third and fourth flights I used new Estes A10-3Ts. The rocket flew substantially faster and higher but still stable.
Recovery
The ejection charge separates the top and bottom halves and these two parts fall back to earth in a helicopter fashion at different speeds. The lower half that holds the engine spins quickly to earth but received no damage when it landed in the short ball-field grass. The much lighter upper half spins like a maple seed and takes a surprisingly long time to land, about the same amount of time as a rocket with a parachute. During one of the flights, a thermal updraft made the upper half almost hover momentarily. The upper half also landed with no damage. All landings occurred within 50 feet of launch site.
Maintenance
The engine's ejection charge can foul up the surface of the connecting coupler and the inside of the upper tube. You will need to keep these areas clean in order to ensure the two halves separate in flight. Unfortunately, this information was left out of the instructions.
Rating
I give the Cyclone 9 out of 10 stars. A rating of 4 out of 5 would be unfair.
PROS: This is a rocket everyone should build at least once. It is a great study in a different form of recovery and is very entertaining to fly for others. It flies safely in a small field or large yard. After years of flying conventional rockets, I found the Cyclone's lack of a parachute and shock cord to be a refreshing change and far less troublesome to fly.
CONS: None, other than the fact that I prefer 18mm engines and would prefer an upscale version of this rocket that uses them.
That's it! Enjoy!

 |
 |
Flights
 |
 |
 |
 |
Hans "Chris" Michielssen (October 10, 2011)
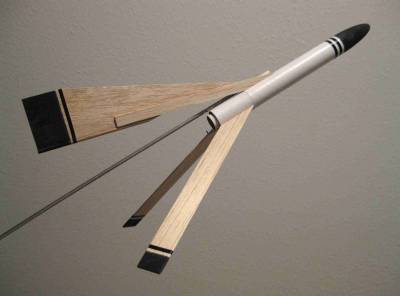
Lonnie mentioned he was "Putting off painting until he tested the rocket". The mapleseed and helicopter recoveries will have much longer duration if the model is flown naked or near naked. The last picture shows a simple paint job using just Sharpie markers. As Lonnie wrote, keep the coupler clean. You'll want a slip fit between the upper and lower sections so it'll separate easily at ejection.
Thanks Lonnie! Chris Michielssen, Odd'l Rockets