| Construction Rating: | starstarstarstarstar_border |
| Flight Rating: | starstarstar_borderstar_borderstar_border |
| Overall Rating: | starstarstarstar_borderstar_border |
| Manufacturer: | Estes  |

Brief:
Almost ready to fly, Star Wars-themed 18mm motor powered rocket.
Construction:
Aside from the Estes launcher set which I have yet to open, the kit consisted of:
- 3 glossy black body tubes, 2 narrow and 1 wide
- Plastic Nose Cone
- Plastic Shoulder
- Coupler Tube
- Plastic Fin Can
- Droid Fighter
- Elastic Shock Cord
- Parachute kit
Since this one is almost ready to fly, there is little construction involved. In fact, the only construction involves the flight probe; the fighter is completely assembled.
The process starts with attaching the elastic shock cord to the shoulder transition. What is supposed to happen is that the elastic is knotted and then passed through a hole. I have every reason to believe that the elastic will soon burn through so I substituted a length of Kevlar®. The Kevlar® was then passed through the large diameter body tube. Then cement was used to glue the shoulder to the large body tubes.
While that dried, the coupler tube was used to join the 2 small diameter body tubes. It should be noted that one of these is a little longer than the other by design. The now lengthened small diameter body tubes were now glued to the shoulder. This produced a long skinny tube connected to a shorter, fatter one.
The other end of the skinny tube was cemented into the plastic fin can. This can is asymmetric so as to allow mounting of the actual droid fighter. The result is a funny looking rocket with only two fins which gets fatter toward the nose.
At this point, I joined the generous length of elastic provided to the Kevlar®, giving me a very long shock cord. I like them long. I tied the elastic to the plastic nose cone at its halfway point and tied the far end of the elastic to a swivel. I connected the parachute to the swivel.
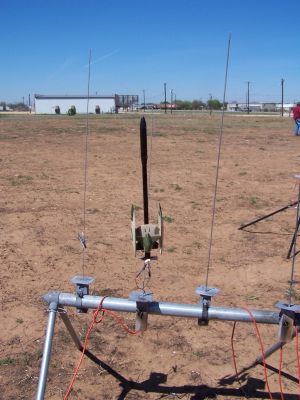
Before flying though, you might as well mount the fighter to the probe you just built. After all, the fighter is the reason you wanted the kit, right? The fighter slid into place with a plastic lug. There is a well hidden switch that allows you to dismount the fighter for display.
PROs: extremely easy and fast to build.
CONs: elastic shock cord just waiting to burn through.
Finishing:
This model is pre-finished. The tubes and plastic are place and the model is molded in color so there is nothing to
finish.
PROs: looks fairly good even with the flight probe, no painting or sanding.
CONs: no room for individuality.
Construction Rating: 4 out of 5

Flight:
The C6-3 is the only recommended motor for this rocket.
On launch day, I prepped it with some dog barf and motor and put it on the rod. As I put it on, I noticed that the lower launch lug had a crack in it. I decided to launch anyway and that was a mistake.
The lower lug cracked the rest of the way on launch and the upper lug was not long enough to keep the rocket straight. It arced over immediately and described a parabola into the ground. The probe section of the rocket was totaled but I am going to save the fighter itself for possible recycling.
PROs: looked pretty cool even with the flight probe.
CONs: does not look cool as a lawn dart, plastic lugs are brittle and subject to failure.
Recovery:
The recovery on this one consisted of picking up the individual pieces.
Other Reviews
- Estes Star Wars Droid Fighter By Scott Turnbull
This is one of those Star Wars plastic model starter kits. The kit consists of a handful of standard rocket components to which is mounted a detailed plastic representation of a Star Wars Episode I Droid Fighter. Recovery is via a standard chute. Included with the kit is a Porta-Pad, Launch Controller with Star Wars Logo, and launch supplies for three flights. The base of the rocket ...
 |
 |
Flights
Date | Flyer | Rocket | Altitude |
|---|---|---|---|
Sponsored Ads
 |
 |


