| Construction Rating: | starstarstarstarstar_border |
| Flight Rating: | starstarstarstarstar_border |
| Overall Rating: | starstarstarstarstar_border |
| Published: | 2010-07-17 |
| Diameter: | 1.64 inches |
| Length: | 26.60 inches |
| Manufacturer: | Estes  |
| Skill Level: | 3 |
| Style: | Futuristic/Exotic |

Brief:
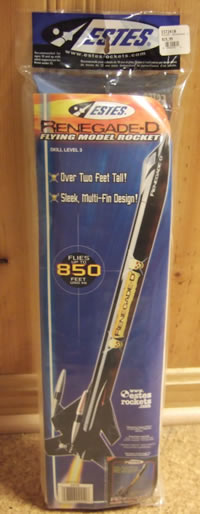
The latest incarnation of the Estes Renegade kit has changed the rocket from a 2-stage to a single-stage, probably because of the booster stage's tendency to semi-glide recover at a rather high rate of speed. My daughter chose the kit at the local hobby shop, because "lots of fins are cool, daddy!"
Construction:
I have been impressed with the quality I have been seeing from the newer Skill 2 or higher kits from Estes, with one main gripe, that being the shock cord length and mounting.
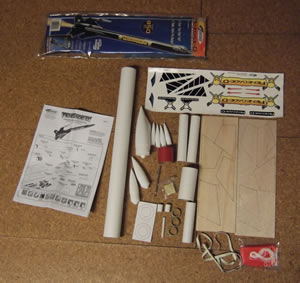
The instructions are straightforward, with line drawings, a fin alignment template, and the standard wraparound tube marking guides to be cut out of the instruction booklet.
I built the motor mount first, and added an 18" length of Kevlar cord I had in my parts kit, which I tied around the motor mount tube between the centering rings and pressed into the glue fillet on the underside of the forward ring. While that dried, I constructed the add-on pods from the tubes and nose cones according to the instructions.
Fin assembly went rather quickly, once I realized that white glue is best suited for fillets after the medium CA has made the initial bond. Once the fin fillets were dry, I added the fin pods, again starting with medium CA and filleting with white glue.
The motor mount tube was then installed into the rear body tube, a holdover from when the Renegade was a 2-stage, as the rear tube was just long enough to contain the motor mount and half of a tube connector.
As the rear tube assembly was drying, I mounted the fins to the main BT, again with CA then white glue fillets. Once everything was dry, I connected the two body tubes together. I noticed that  the engine hook extended beyond the rearmost extension of the lower fins, so I trimmed the large easy-pull tab down to a short nub to allow the model to stand on the three large rear fins. Last, I stuffed the included clay nose weight into the nosecone using a long dowel section. I worried that it wouldn't stick under power, but it hasn't yet moved.
Finishing:
I sprayed the rocket with white double-thick primer, then sanded and sprayed with el-cheapo Wal-Mart red, since that was what color my daughter chose. 2 more coats of red, with light sanding between, and the model was ready for the decals. I have to give Estes a plus here for the quality of the water-slide decals included. After my (bad) experience with stickers on my last Estes kit, I was pleasantly surprised to see the water-slides here. After the decals went on, I shot a quick clear coat, and we were ready to fly.
Construction Rating: 4 out of 5
Flight:
I brought the red Renegade-D to the monthly NOVAAR launch in Great Meadow, and sent it up first on the recommended D12-5, the only motor listed for this kit. Perfect boost, nearly straight up with a little weather cocking, and the ejection kicked just at apogee. The chute didn't want to completely unfurl, but the rocket landed with no damage in the grass. The second flight, on an E20-7, took off like a scalded goose, coasted over, and blew the engine out of the mount when the ejection charge blew. Luckily the chute also popped, but it got hung  up on the fins and didn't open until about 25 feet from the ground. Again, zero damage recovery, but it was a bit hair-raising watching it flat-spin out of the sky. I repacked the rocket with some dog barf, installed the chute, and put in another D12-5. The wind had picked up a bit by now, so the rod was slightly angled into the wind. The rocket launched and soared up with no corkscrewing at all, and recovery popped just barely past apogee. The chute opened up, and it landed about 40 feet from the launch pad. I must agree with the manufacturer that the D12-5 is the perfect engine for this kit. I am now a dog barf fan also, much easier to fill the big tubes than standard recovery wadding.
Recovery:
As stated, I ignored the stock Estes tri-fold mount and instead wrapped Kevlar cord around the MMT, and tied the rubber-band shock cord to that.
With the recommended motor, ejection is perfectly timed, and the chute (when it opens) is a good size that the rocket comes down without too much drift and without any damage if you are fortunate enough to have a grass landing field.
Flight Rating: 4 out of 5
Summary:
Now that nobody is likely to get hurt with a ballistic trajectory booster stage, I think Estes has a winning kit with the repackaged Renegade-D. All the cub scouts were staring and chattering about the red rocket with all the fins, and many of the adults were interested to see how this model would fly. I intend to find out how many times this bird will fly.
If Estes changed 3 things, this would be "The Perfect Kit":
1) Kevlar cord mounted to the MMT
2) Longer shock cord that does not make me think 'rubber band'
3) Rip-Stop Nylon parachute
Overall Rating: 4 out of 5
Other Reviews
- Estes Renegade-D By Jeff Boldig (January 20, 2015)
This was a neat kit of a space ship type rocket. It included lots of fins and large pods on the end of the largest fins. Components The parts were typical Estes kit. Everything went together well and the instructions were typical for Estes kits. /h2 This went together quite well. I did add a piece of Kevlar for the shock cord. It was ...
 |
 |
Flights
 |
 |
 |
 |
John R, Brandon III (November 26, 2010)
I had two of the old two-stage Renegades, one of which had a three-motor cluster in the booster and a streamer in each pod. Lost my nerve and never flew it. Aside from the "semi-glide" recovery style of the booster, this rocket also suffers from the Krushnik Effect...caused by the recessed motor nozzle.